This series of articles will explore the detailed process of setting up a cybersecurity home lab on a virtualization platform.
Building a Cybersecurity lab offers a fantastic opportunity to gain hands-on security experience, develop practical skills, and test cybersecurity tools. On a Virtualization Platform you can test and explore cybersecurity concepts and methodologies.
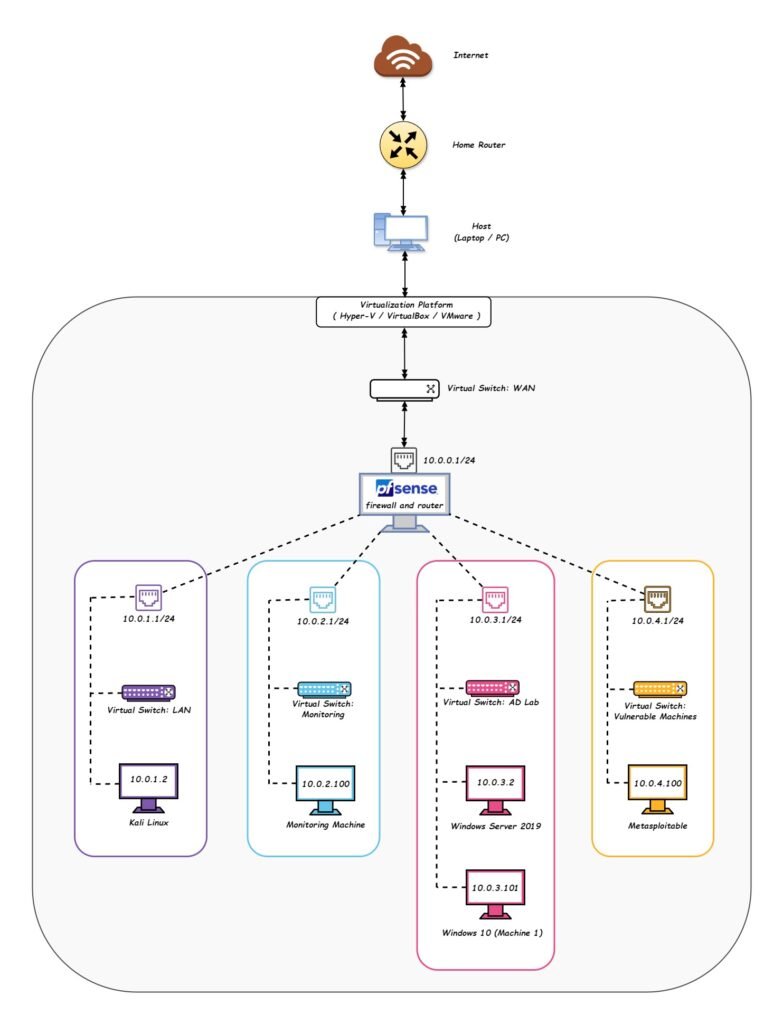
This article will specifically focus on the appearance of our security lab, the setup of the network, the prerequisites, and other features that need to be enabled to use the security lab.
What We’ll Build.
Lets talk about what our home cybersecurity lab will contain.
Virtualized pfSense firewall.
pfSense is a free, open-source firewall and router that can be virtualized. We will use Virtualized pfSense firewall as a gateway, and all the other subnets will connect to each other and the internet via Virtualized pfSense firewall.
Subnets for Different purposes.
Now we have to create different subnets to hold different VM’s created for testing.
WAN.
Using this subnet, all the other networks will be able to access the internet and communicate with each other. This subnet will be on Virtualized pfSense firewall.
LAN (Kali Linux).
This subnet will host only one machine with Kali Linux OS and will use it to install security testing tools and perform security-related activities.
Monitoring Machines.
We will install tools like Splunk, Wireshark, and Sysmon on the monitoring machines to monitor and collect logs.
Active Directory.
This subnet will hold all the machines in a virtualized local Active Directory environment. This subnet is directly connected to Virtualized pfSense firewall.
Vulnerable Machines.
This group will contain Metasploitable 2 (a virtual machine that is intentionally vulnerable to demonstrate common vulnerabilities and test security tools.)
You can navigate to https://www.vulnhub.com/ and choose from any available vulnerable machine on the website.
Network Diagram.
Prerequisites.
To setup this lab, It is recommended to have a system with Multithreaded CPU (with Virtualization Support) and at least 16GB RAM (32GB RAM recommended) and Plenty of free disk space to store the virtual machines.
Enable Virtualization in the BIOS.
To use virtualization platforms like Hyper-V or VirtualBox, we need to ensure that we enable virtualization in the BIOS of the machine.
The virtualization option is represented by different words in the BIOS, for AMD it is referred to as SVM Mode (Secure Virtual Machine mode), and in Intel it is referred to as Intel Virtualization Technology (Intel VT).
Make sure you enable SVM Mode or Intel Virtualization Technology (Intel VT) based on the processor you are using.
How to Run Intel® Virtualization Technology Using Intel® Processor.
Select a Virtualization Platform.
Several virtualization platforms are available in the market, including both free and paid versions, where you can install VMs.
Microsoft Hyper-V.
Hyper-V lets you run multiple operating systems as virtual machines on Windows. Hyper-V is available on 64-bit versions of Windows 10 Pro, Enterprise, and Education. It is not available on the Home edition.
Oracle VirtualBox.
This is another free virtualization product for enterprise as well as home use.
You can download Oracle VirtualBox using the Official Home Page.
VMware Workstation Pro.
This paid tool allows you to run multiple operating systems as virtual machines on a single Windows or Linux PC.
For my cybersecurity home lab setup, I will be using Microsoft Hyper-V as a virtualization platform.
Create Virtual Switches.
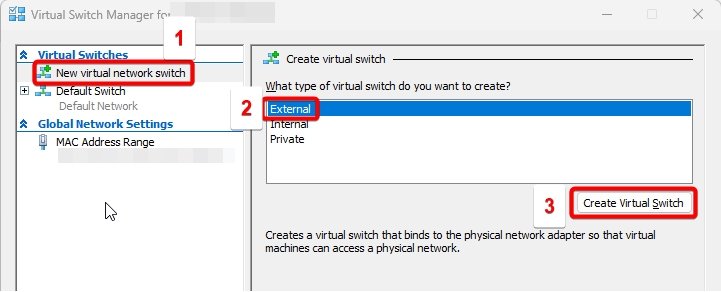
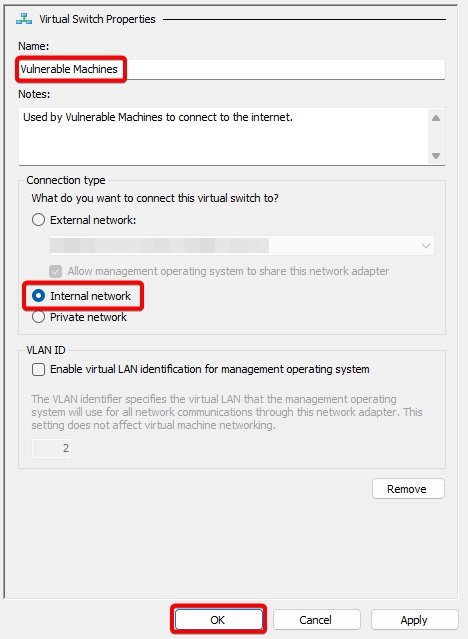
To create different switches for each subnet, open Hyper-V Manager on the computer, and then open the Virtual Switch Manager under the Actions tab (located on the right-hand side in Hyper-V Manager).

Virtual Switch 1: WAN.
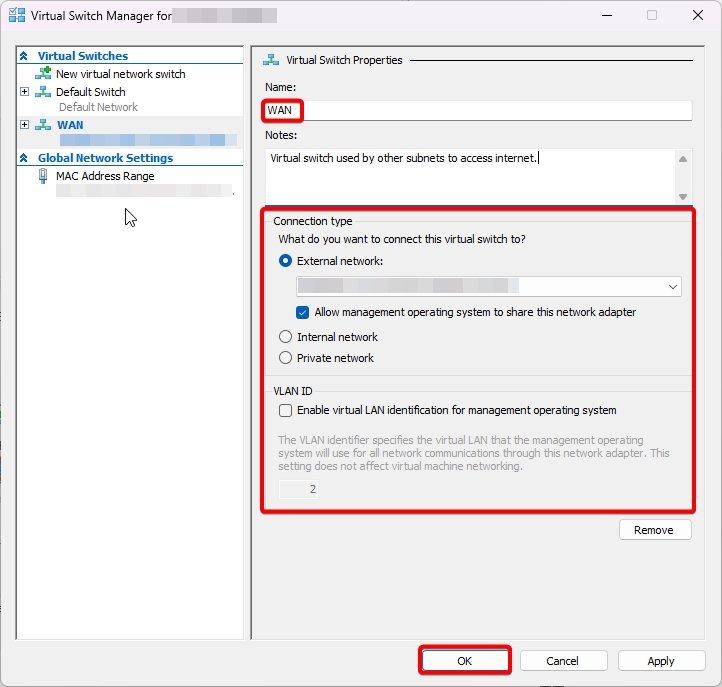
This virtual switch will connect machines in other subnets to the internet and hence we will select the switch type as external and then select create virtual switch.
In the connection type section, please select the physical ethernet adapter which is connected to the internet.
Virtual Switch 2: LAN.
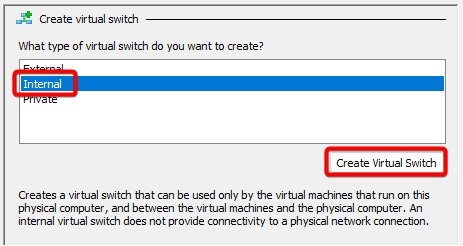
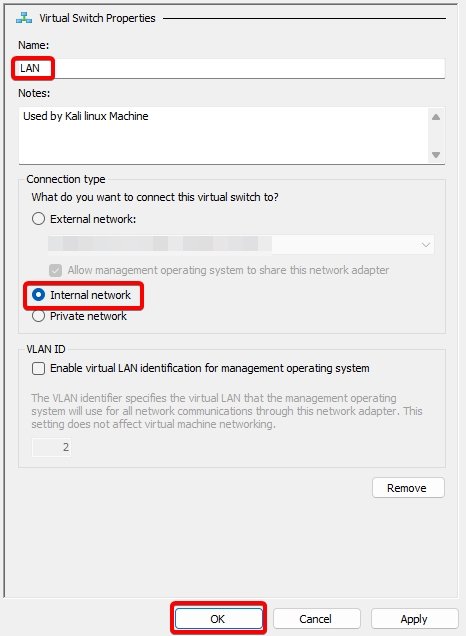
Virtual Switch 3: Monitoring.

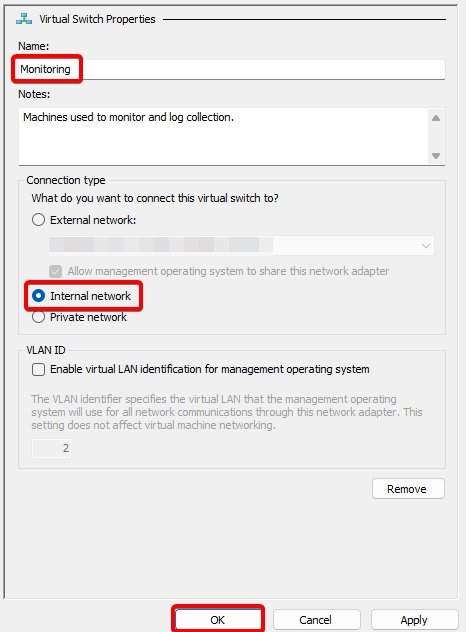
Virtual Switch 4: AD Lab.
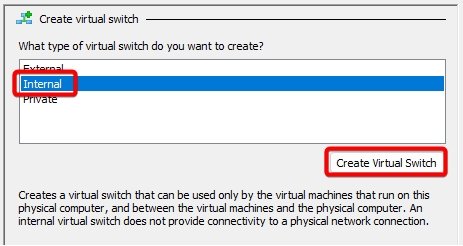
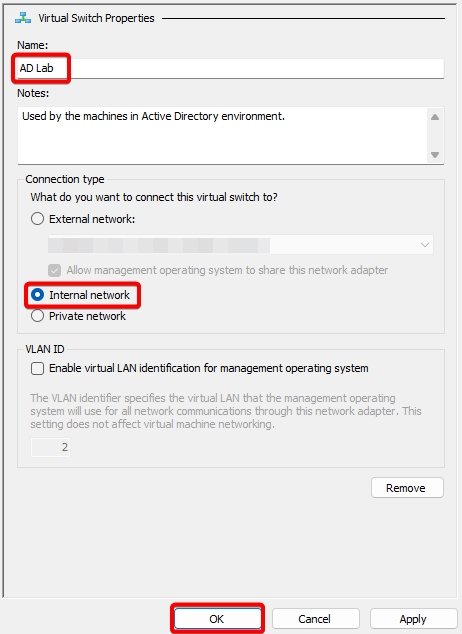
Virtual Switch 5: Vulnerable Machines.

Conclusion.
Creating a professional cybersecurity home lab is the first step in the journey towards becoming a cybersecurity practitioner. By getting hands on experience on security tools and techniques, you create an immersive learning environment that fosters exploration, experimentation, and growth.
- Part 2 – Installing pfSense Firewall on Virtual Machine.
- Part 3 – Setup Kali Linux on Virtual Machine.
- Part 4 – Configuring the pfSense Firewall.
- Part 5 – Active Directory Forest Setup.
- Part 6 – Setting up Windows 10 Machine.
- Part 7 – Setup Monitoring Tool on VM.
- Part 8 – Creating Vulnerable Machines.