This article is about installing and configuring network interfaces of pfSense firewall and gateway on Hyper-V virtual machine.
Table of contents
Download pfSense iso file.
Navigate to https://www.pfsense.org/download/ and download the latest version of iso image using the below specifications.
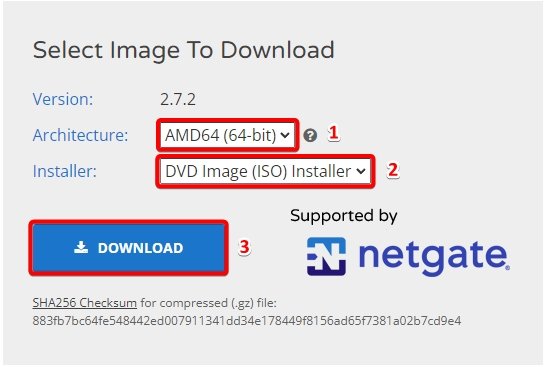
Once the file is downloaded, please extract the .iso file from .gz file in another folder. You will get the file named pfSense-CE-#.#.#-RELEASE-amd64.iso.
Create a pfSense Virtual Machine.
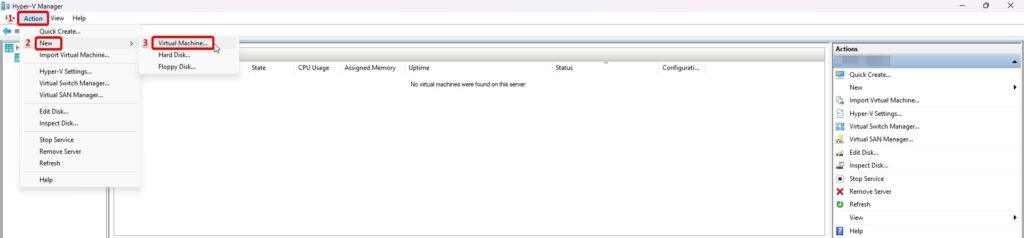
Open the Hyper-V Manager and Click New > Virtual Machine from the Actions list.
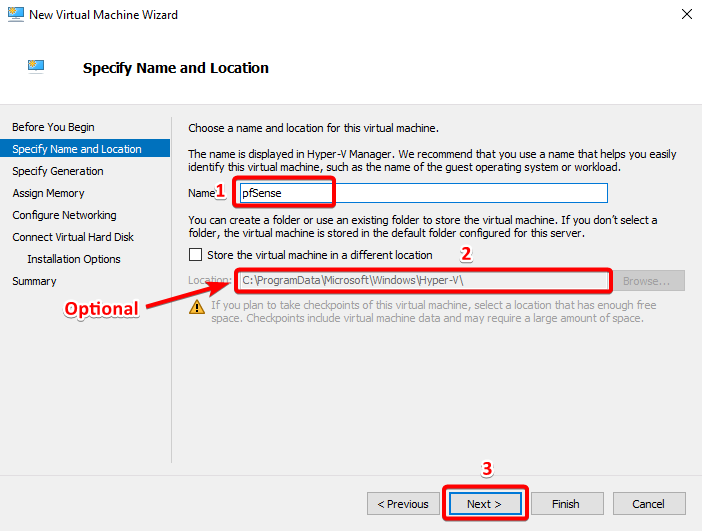
In Specify Name and Location step, Enter a Name for the virtual machine as pfSense.
Select another location on disk to store the VM data (Optional).
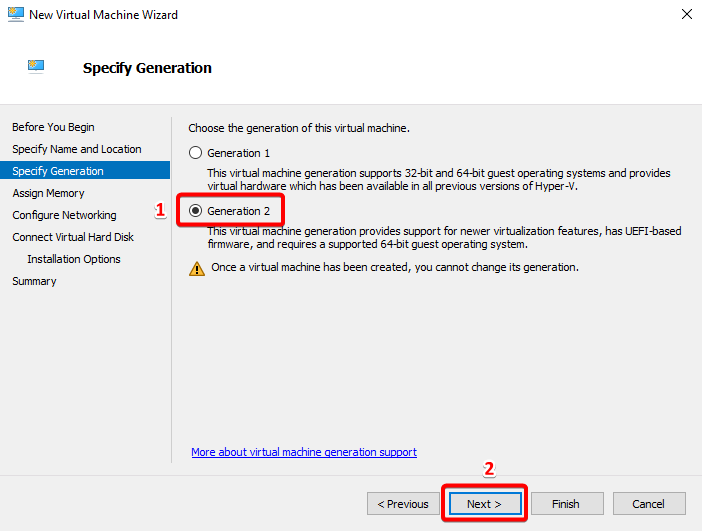
In the Specify Generation step, Select the appropriate virtual machine generation: Generation 2.
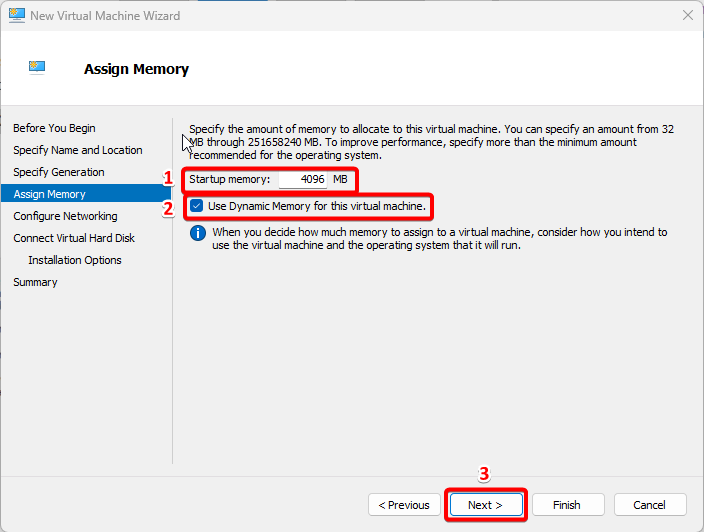
In the Assign Memory step, Please add enough RAM to meet the requirements of this environment. 2GB RAM or more is better. Make sure you select “use dynamic memory for this virtual machine“.
In the Configure Networking step, Select WAN from Connection drop-down menu.

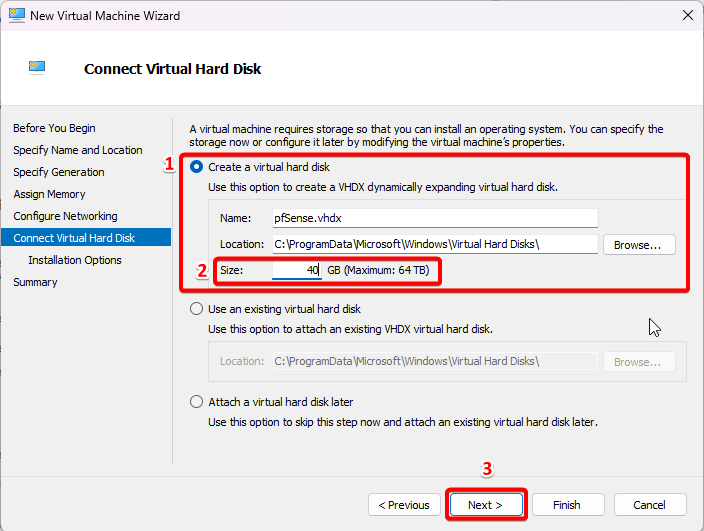
for the Connect Virtual Hard Disk step, Select Create a virtual hard disk and assign 20 to 40 GB for the VM disk.
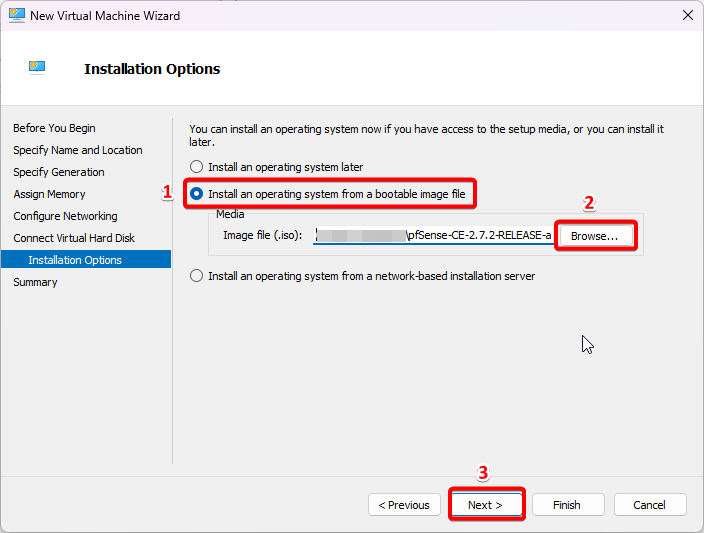
In the Installation Options step, Select Install an operating system from a bootable image file and Browse to the pfSense software installer ISO image.
Click Finish if all of the information is correct.
Change settings of the pfSense Virtual Machine.
Add Network adapters to pfSense Firewall.
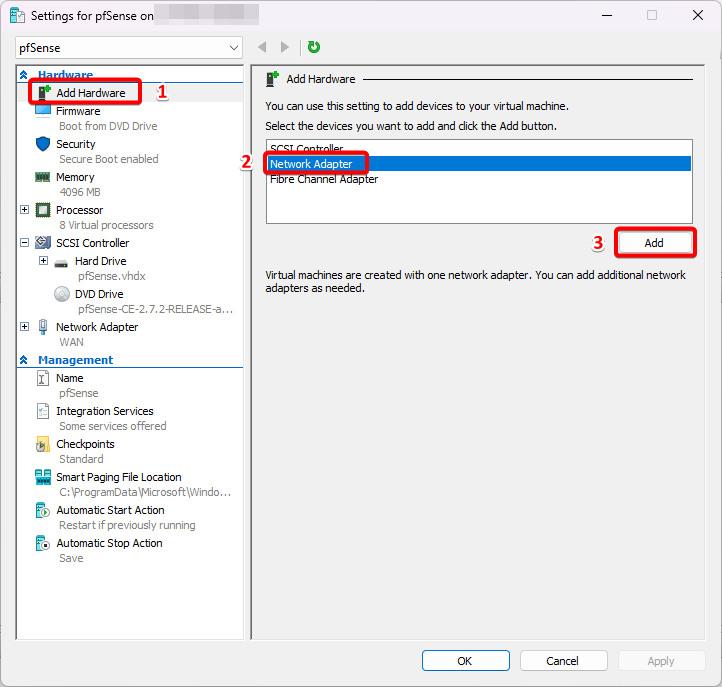
After the pfSense VM is created, we have to install new network adapters in the machine to add new subnets.
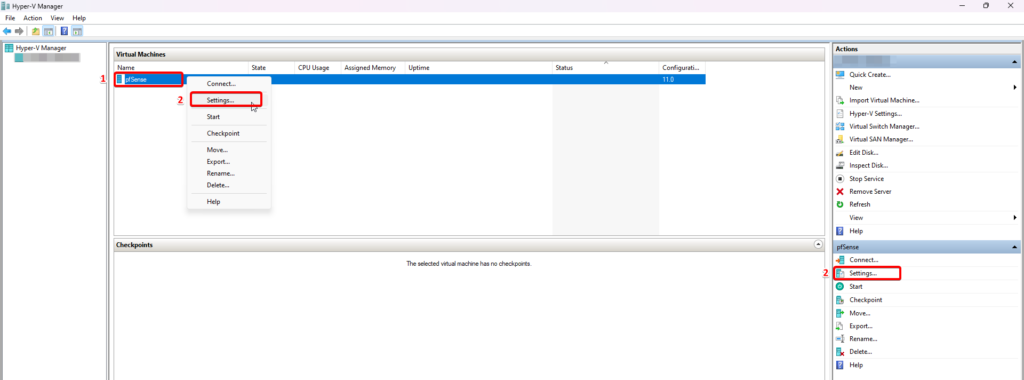
Select the VM in the Virtual Machines list in the Hyper-V Manager > Click Settings on the Actions panel for this VM > Select Add Hardware under Hardware in the left side panel > Select Network Adapter.
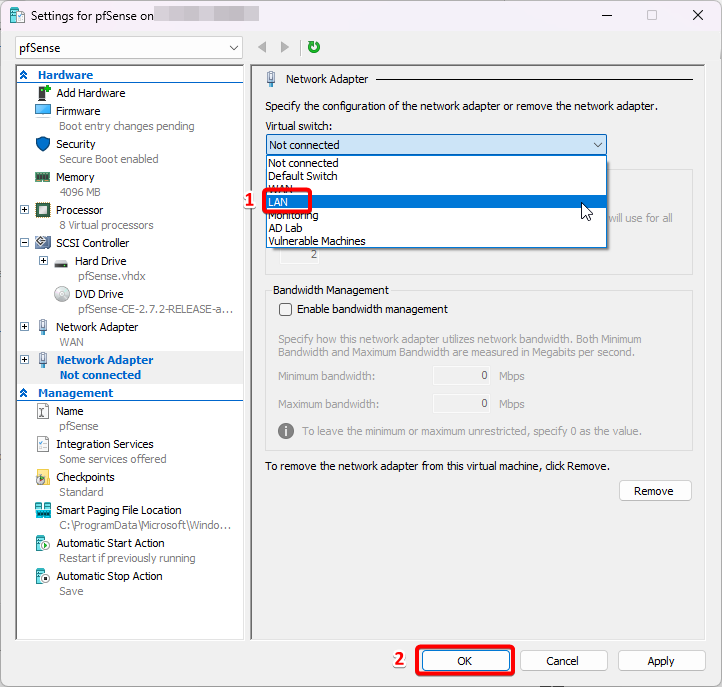
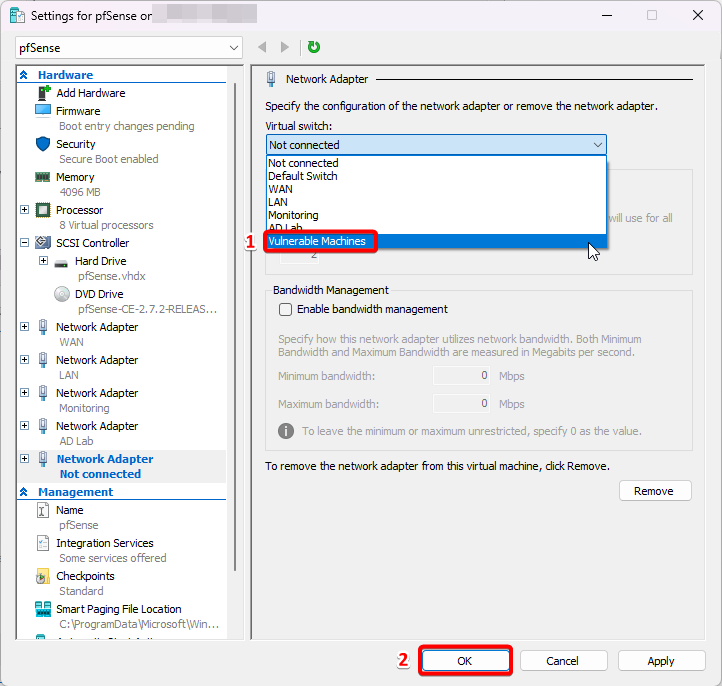
once you add the new network adapter, make sure it is connected to the virtual switch named LAN.
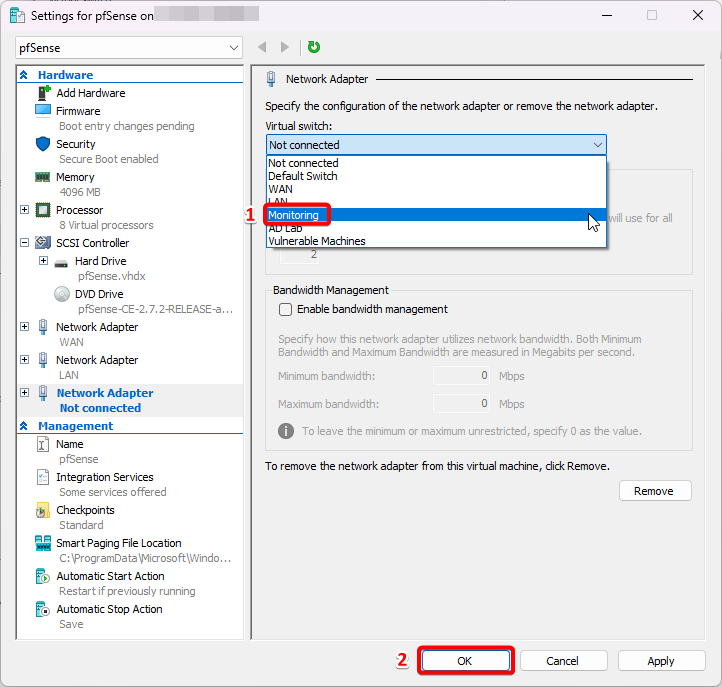
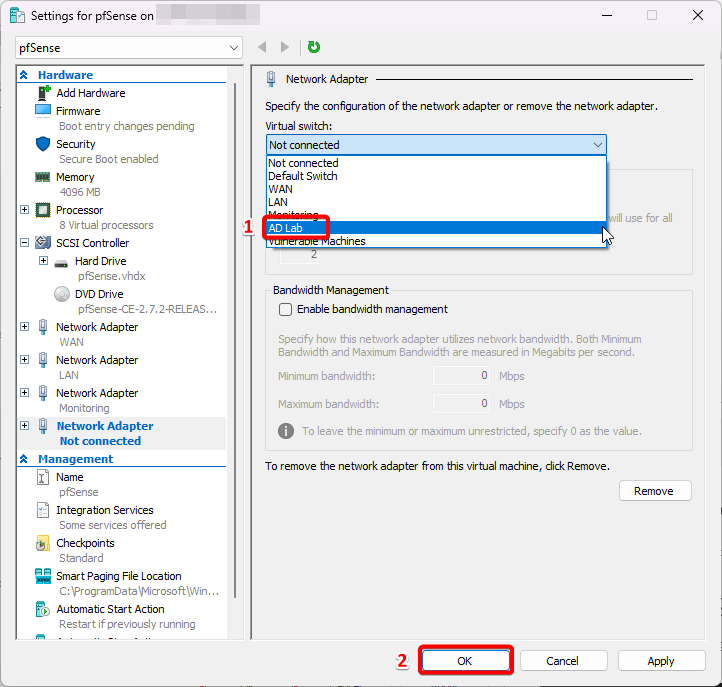
We have to create new virtual network adapter to connect to the virtual switch named Monitoring, AD Lab and Vulnerable Machines.
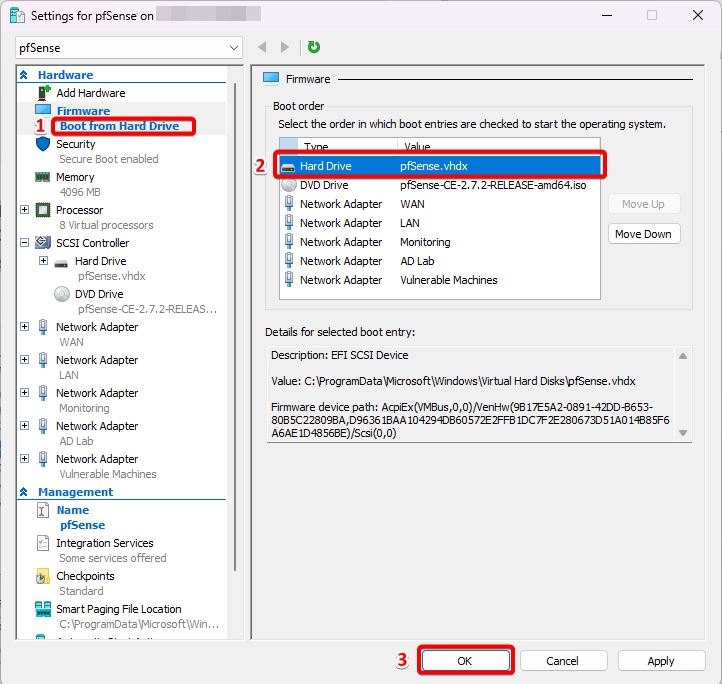
Change Boot order.
Select Firmware under Hardware in the left side panel > Select the Hard Drive entry in the Boot Order list > Click Move Up until the Hard Drive entry is at the top of the list.
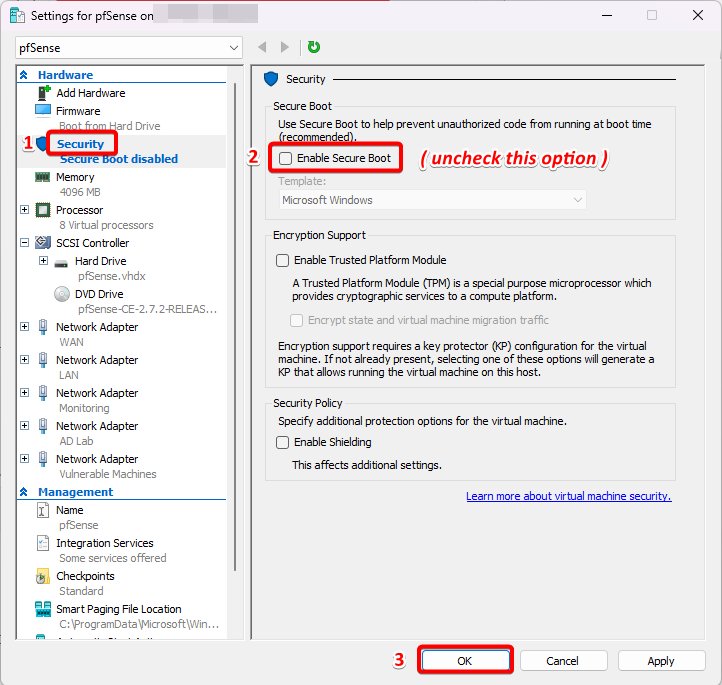
Disable Secure Boot.
Select Security under Hardware in the left side panel > Uncheck Enable Secure Boot.
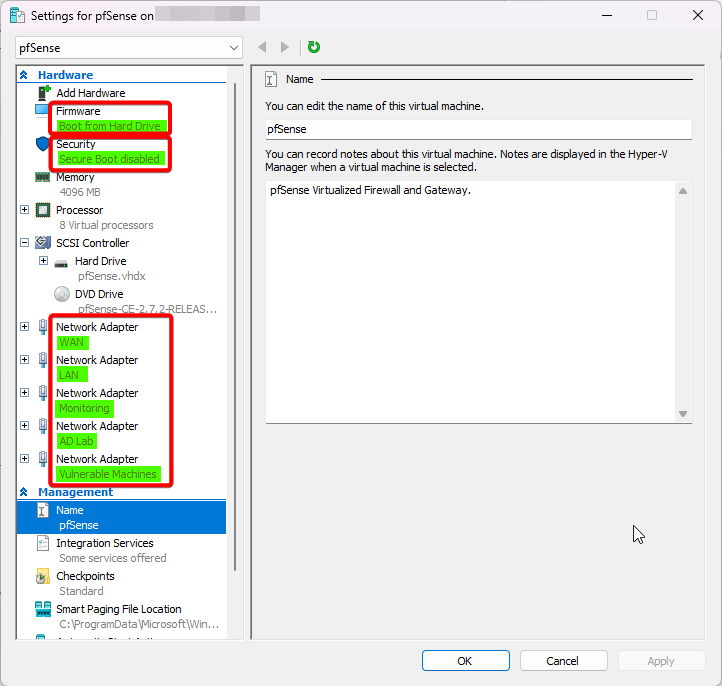
Final Settings Check for pfSense.
The changed settings of pfSense VM should look like below.
Installing pfSense on virtual machine.
Open Hyper-V manager, select the virtaul machine named pfSense and select start.
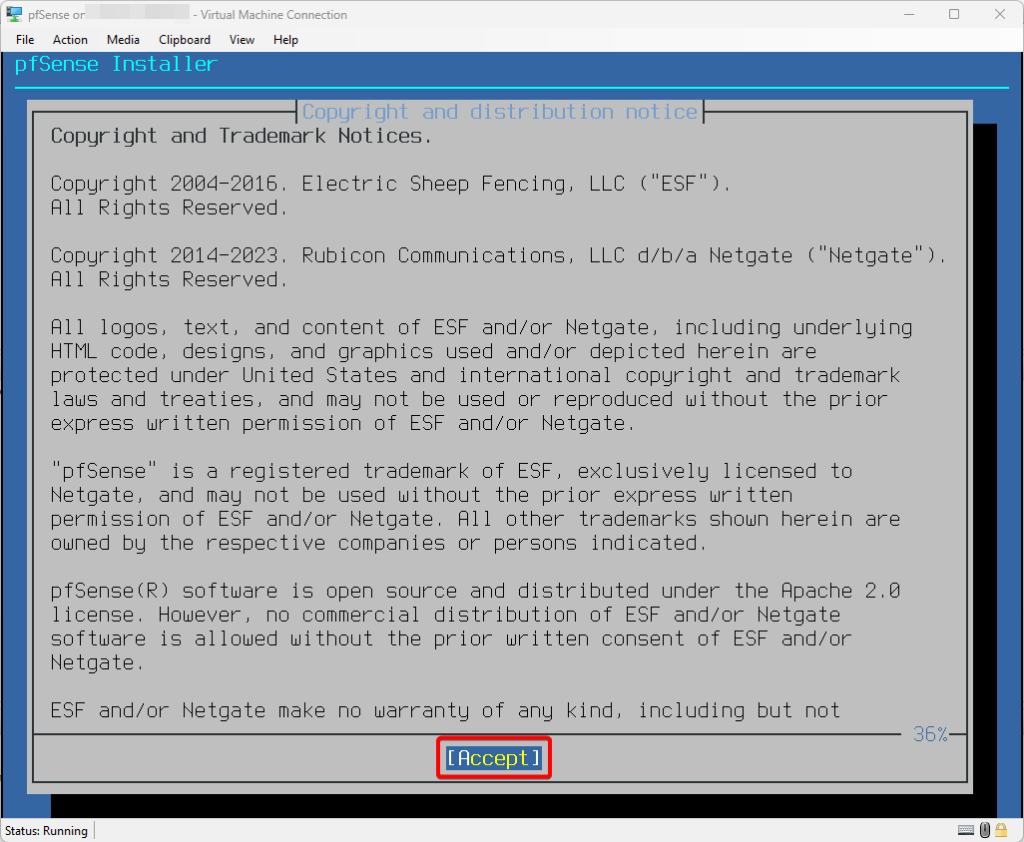
Accept the copyright and distribution notice
Choose Install pfsense

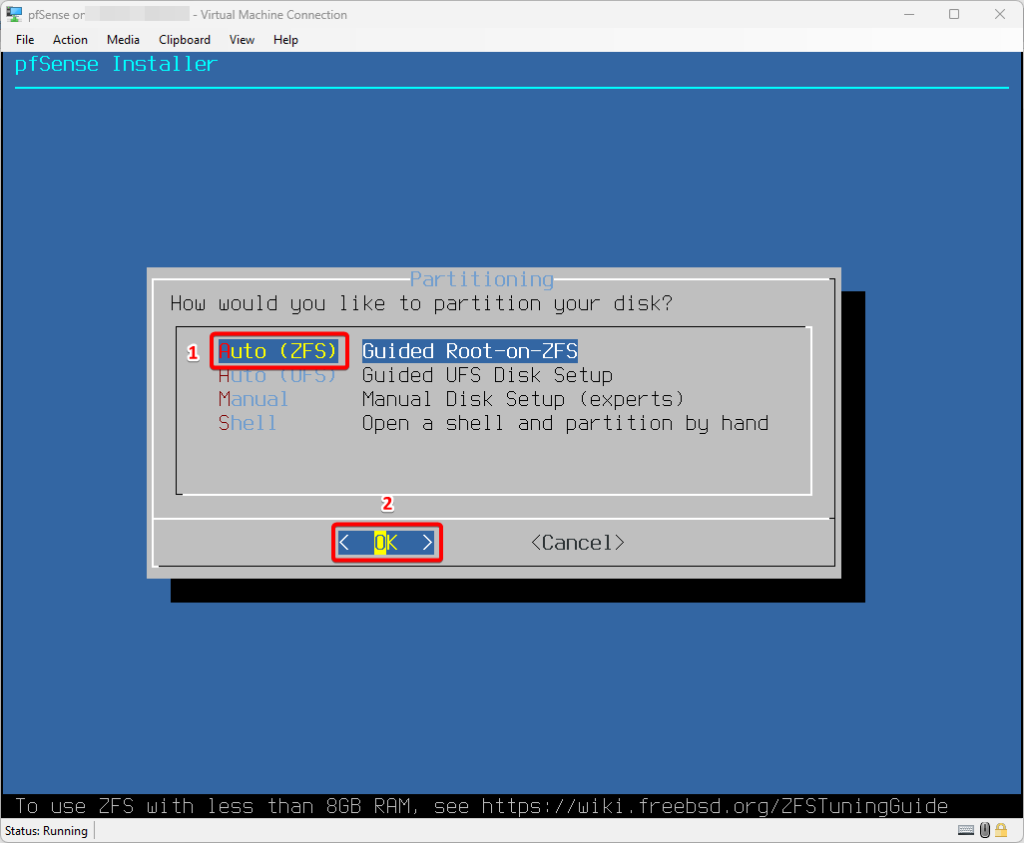
Choose Auto (ZFS)
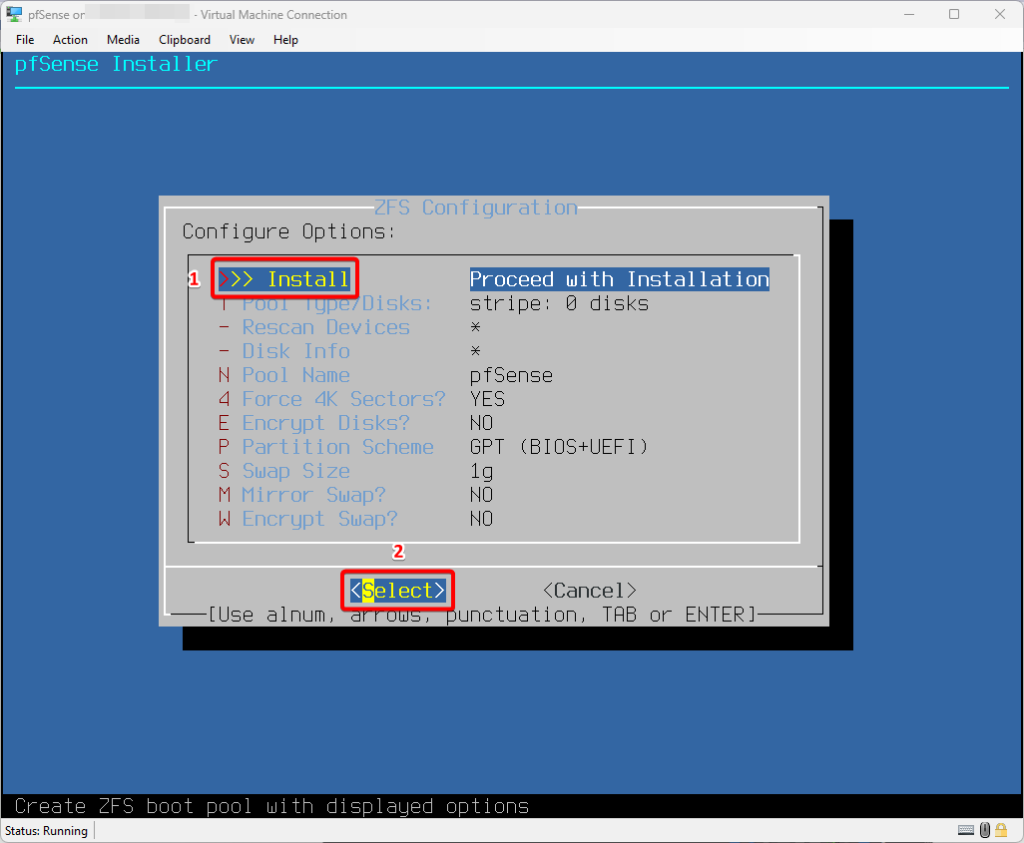
For ZFS Configuration settings, select Proceed with Installation
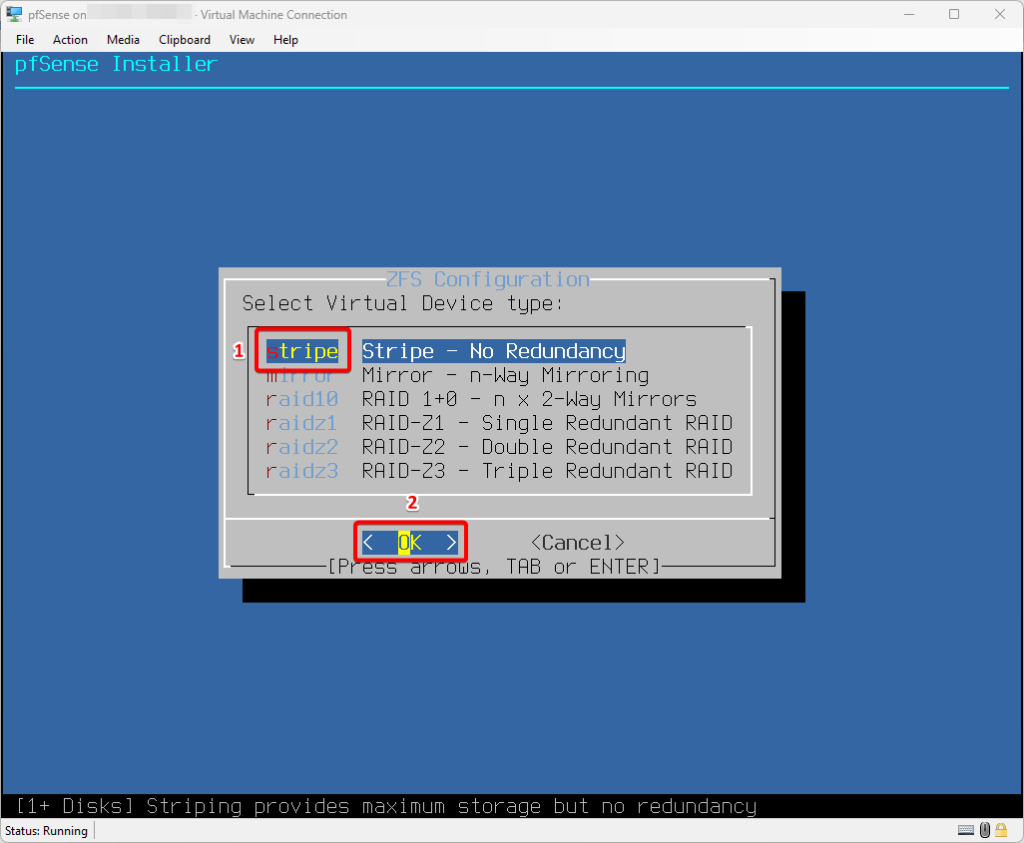
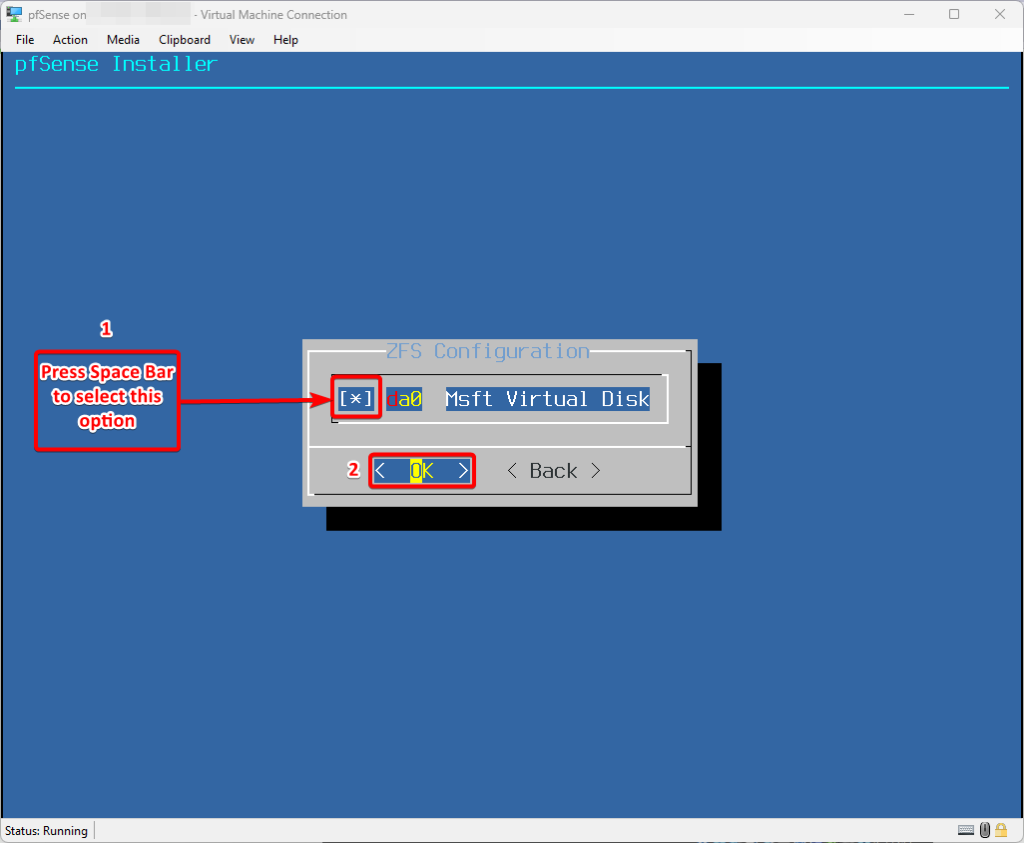
Select Stripe – No Redundancy
Use Space Bar to select the virtual disk
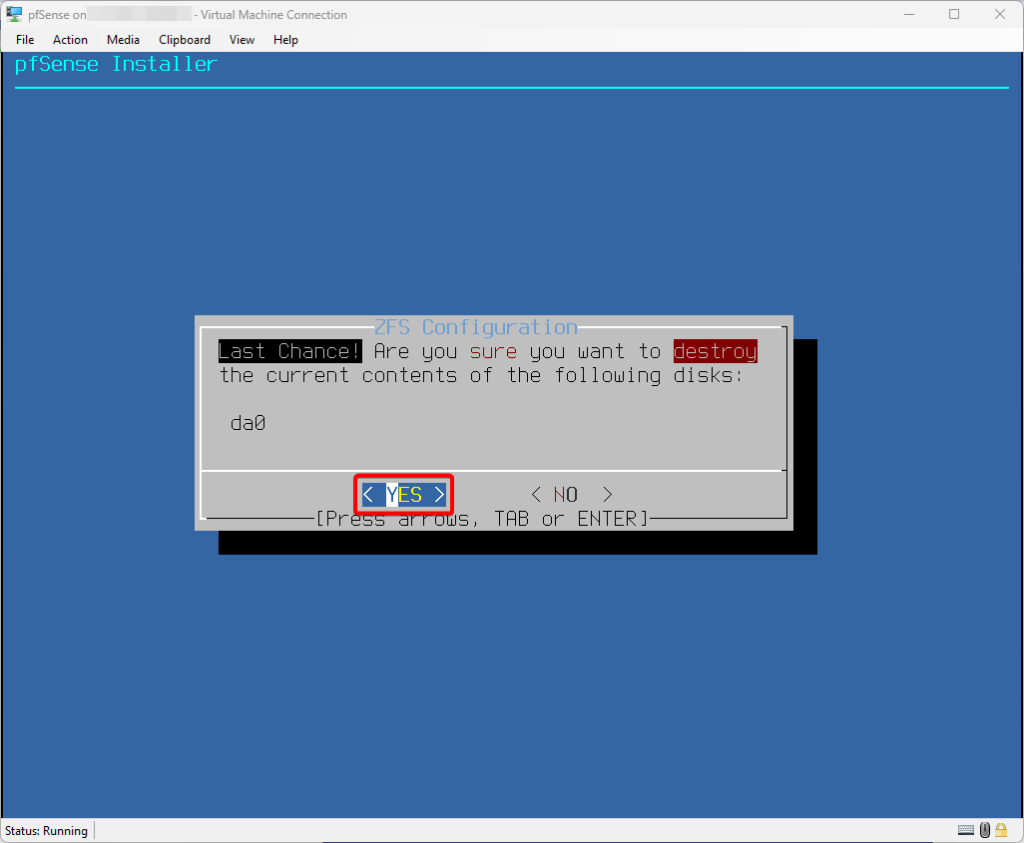
Press Yes to start the installation and wait for the installation to be completed.
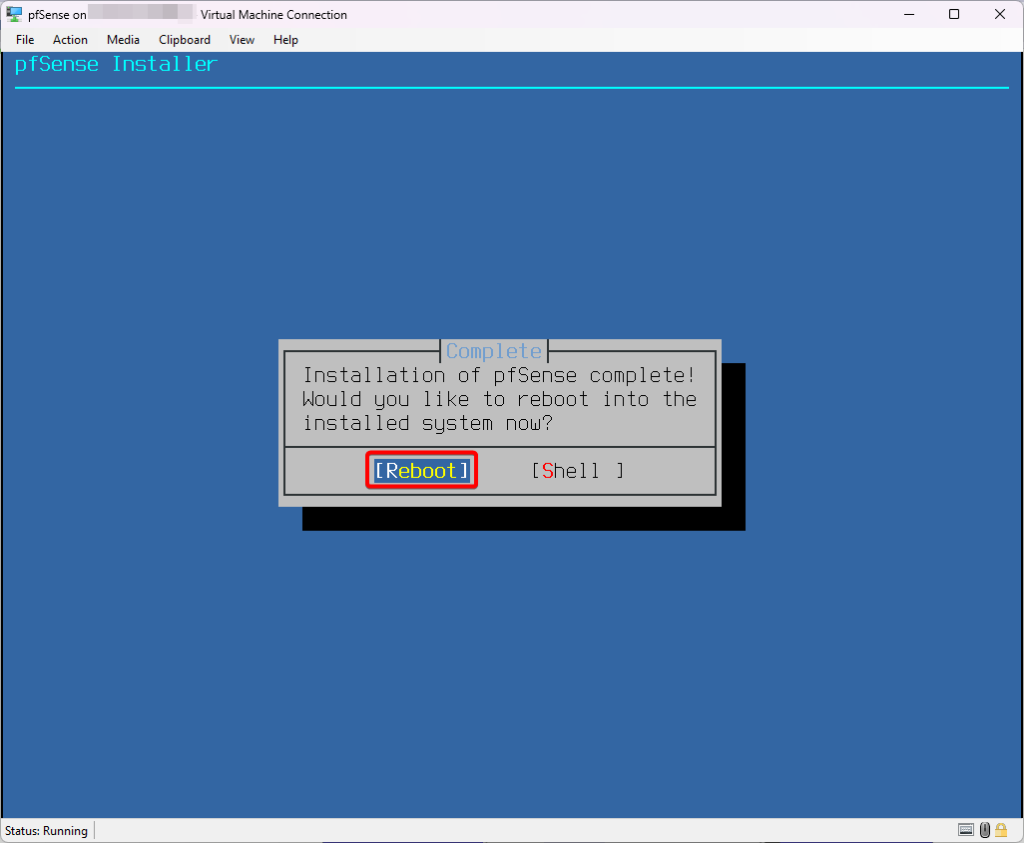
Reboot after the installation is completed
pfSense Configuration.
Once the machine is rebooted, we have to change few configurations.
When asked Should VLANs be set up now [y|n]? –> choose n

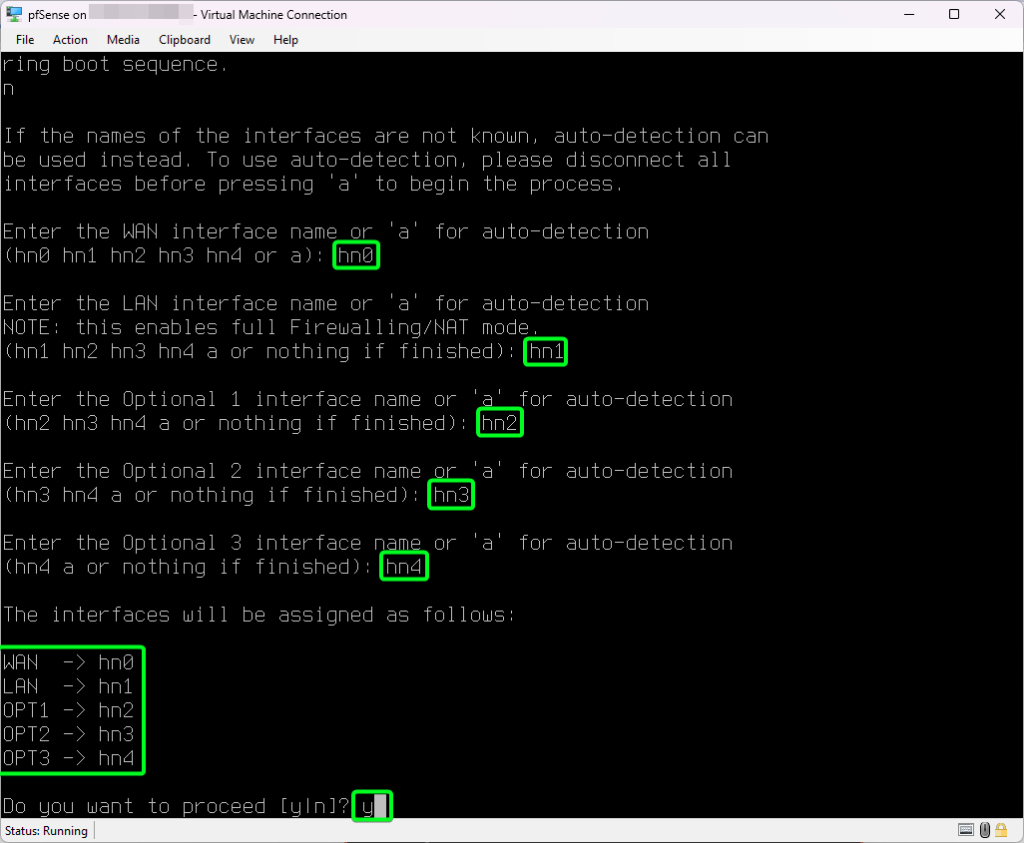
Now we will manually setup the network interfaces.
- Enter the WAN interface name: hn0
- Enter the LAN interface name: hn1
- Enter the Optional 1 interface name: hn2
- Enter the Optional 2 interface name: hn3
- Enter the Optional 3 interface name: hn4
Do you want to proceed?: y
Configuring Interfaces.
You should see something like this in your lab setup.
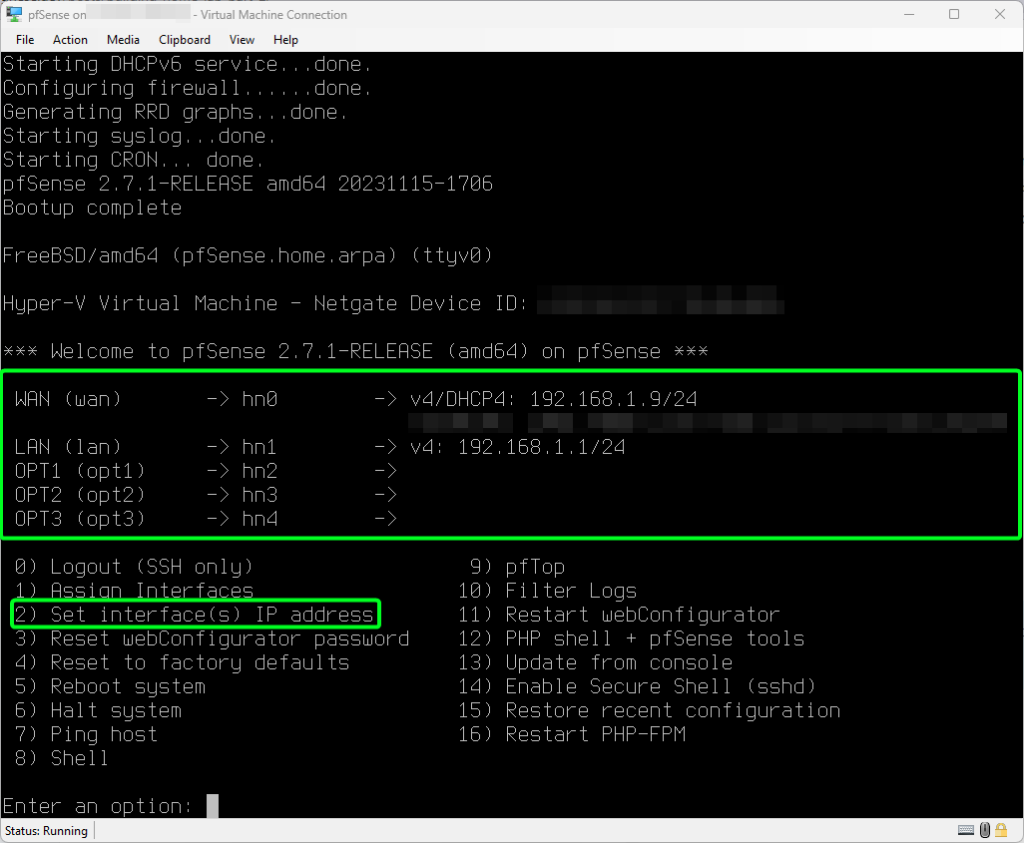
The WAN (hn0) interface got the IP address from my home router network.
The Default LAN (hn1) IP address is 192.168.1.1/24
The Monitoring (hn2), AD Lab (hn3) and Vulnerable Machines (hn4) network interfaces are not yet configured.
Configuring LAN (hn1).
Enter num 2 to select “Set interface(s) IP address” and then Enter num 2 to select the LAN interface.
- Configure IPv4 address LAN interface via DHCP?: n
- Enter the new LAN IPv4 address: 10.0.1.1
- Enter the new LAN IPv4 subnet bit count: 24
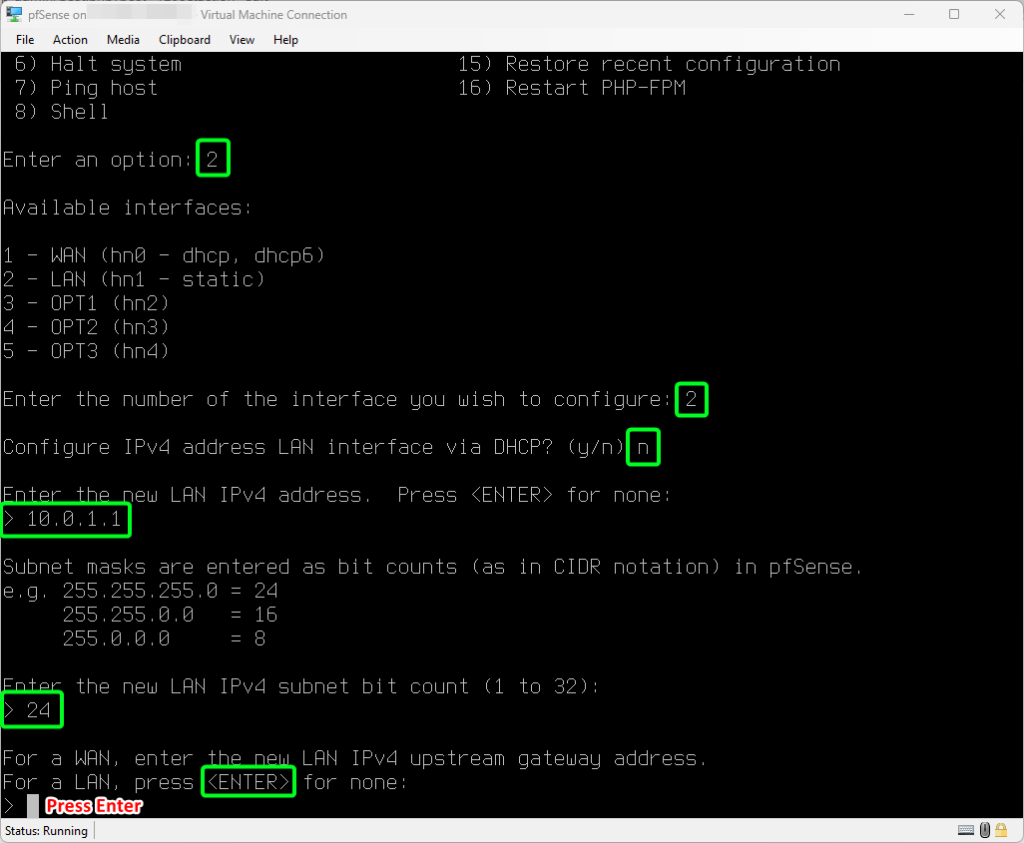
Press Enter as we do not want any upstream gateway for LAN interface.
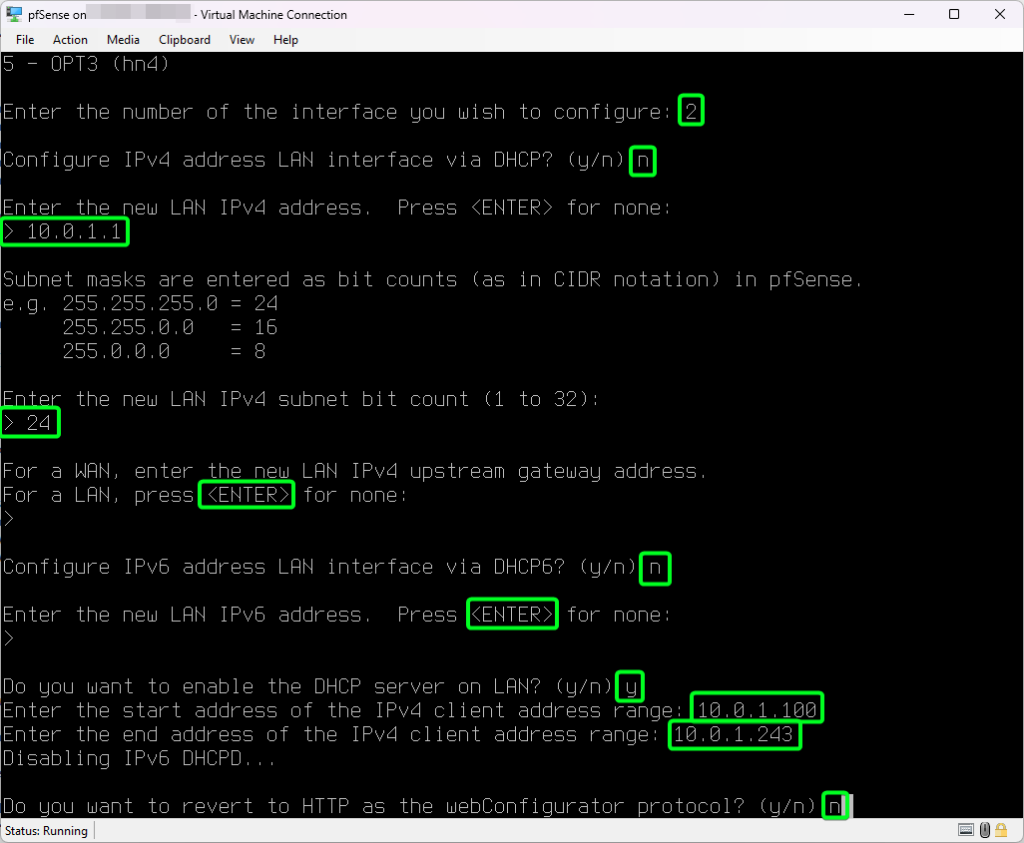
- Configure IPv6 address LAN interface via DHCP6: n
- For the new LAN IPv6 address question press Enter
- Do you want to enable the DHCP server on LAN?: y
- Enter the start address of the IPv4 client address range: 10.0.1.100
- Enter the end address of the IPv4 client address range: 10.0.1.243
- Do you want to revert to HTTP as the webConfigurator protocol?: n
Press Enter to complete the LAN interface configuration.
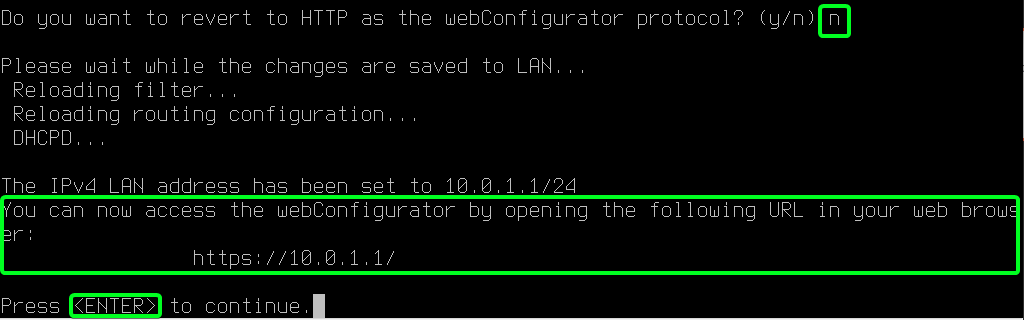
Once we hit Enter key, the LAN interface will be set to the IP address 10.0.1.1/24
Configuring Monitoring (hn2).
Enter num 2 to select “Set interface(s) IP address” and then Enter num 3 to select the Monitoring interface.
- Configure IPv4 address OPT1 interface via DHCP?: n
- Enter the new OPT1 IPv4 address: 10.0.2.1
- Enter the new OPT1 IPv4 subnet bit count: 24
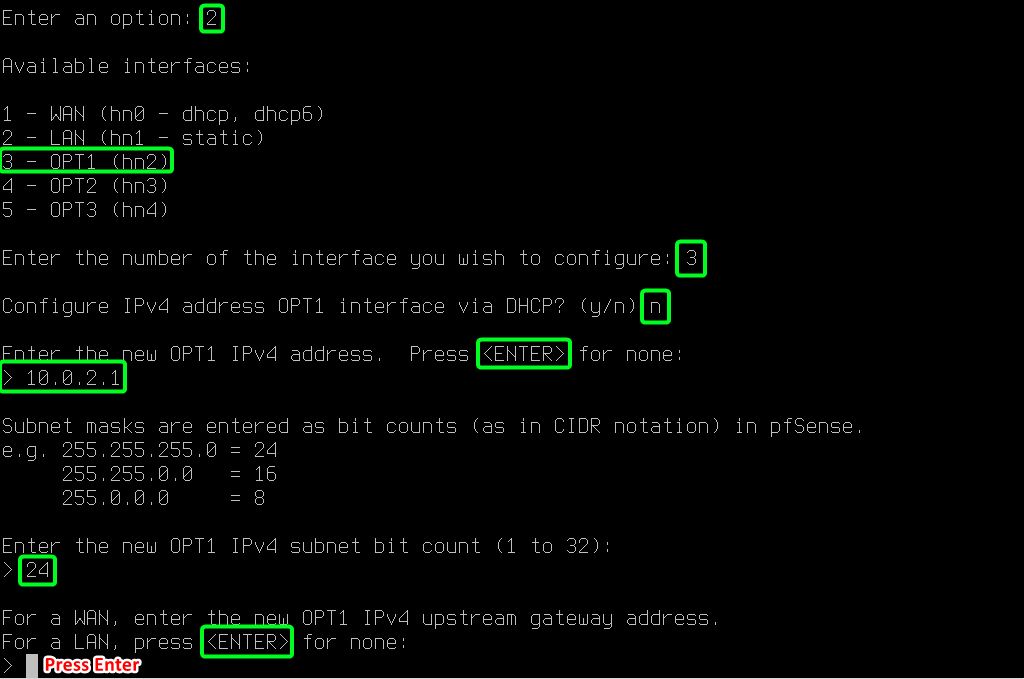
Press Enter as we do not want any upstream gateway for Monitoring interface.
- Configure IPv6 address OPT1 interface via DHCP6: n
- For the new OPT1 IPv6 address question press Enter
- Do you want to enable the DHCP server on OPT1?: y
- Enter the start address of the IPv4 client address range: 10.0.2.100
- Enter the end address of the IPv4 client address range: 10.0.2.253
- Do you want to revert to HTTP as the webConfigurator protocol?: n and hit Enter.

Configuring AD Lab (hn3).
Enter num 2 to select “Set interface(s) IP address” and then Enter num 4 to select the AD Lab interface.
- Configure IPv4 address OPT2 interface via DHCP?: n
- Enter the new OPT2 IPv4 address: 10.0.3.1
- Enter the new OPT2 IPv4 subnet bit count: 24

Press Enter as we do not want any upstream gateway for AD Lab interface.
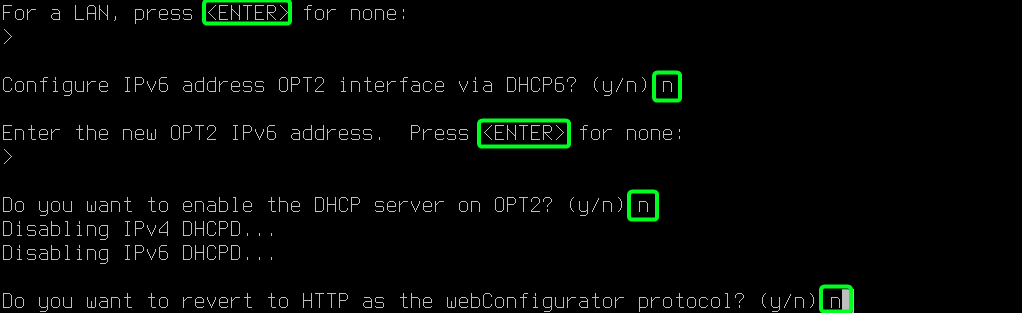
- Configure IPv6 address OPT2 interface via DHCP6: n
- For the new OPT2 IPv6 address question press Enter
- Do you want to enable the DHCP server on OPT2?: n
* This interface will be connected to Active Directory network, so we will not enabled DHCP service. The Active Directory Domain controller will be responsible to assign IP address to the machine in the AD Lab network. *
- Do you want to revert to HTTP as the webConfigurator protocol?: n
Configuring Vulnerable Machines (hn4).
Enter num 2 to select “Set interface(s) IP address” and then Enter num 5 to select the Vulnerable Machines interface.
- Configure IPv4 address OPT2 interface via DHCP?: n
- Enter the new OPT3 IPv4 address: 10.0.4.1
- Enter the new OPT3 IPv4 subnet bit count: 24
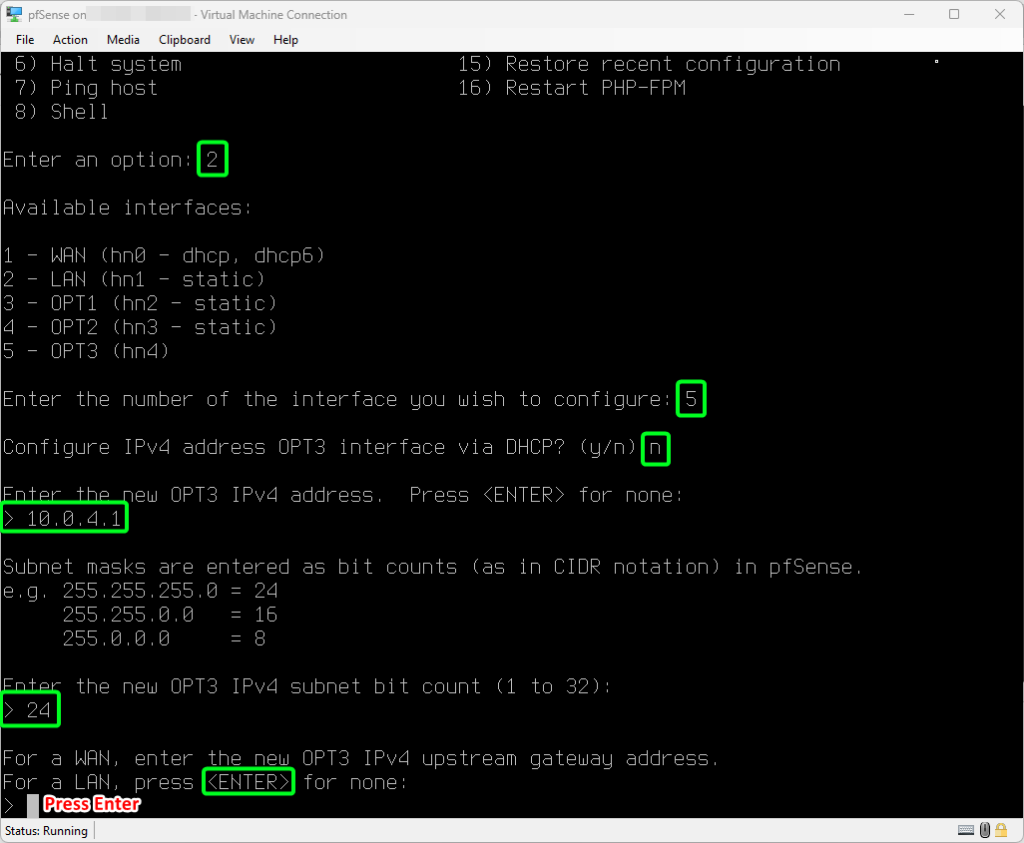
Press Enter as we do not want any upstream gateway for Vulnerable Machines interface.
- Configure IPv6 address OPT3 interface via DHCP6: n
- For the new OPT3 IPv6 address question press Enter
- Do you want to enable the DHCP server on OPT3?: y
- Enter the start address of the IPv4 client address range: 10.0.4.100
- Enter the end address of the IPv4 client address range: 10.0.4.253
- Do you want to revert to HTTP as the webConfigurator protocol?: n

Final Interface Check.
Below would be the interface IP addresses look like.

In this module, we have installed pfSense Firewall on Virtual Machine. In the next module, we will setup Kali Linux on virtual machine.