In this module, we are going to install Kali Linux. It is an exceptional tool for conducting security assessments and Penetration testing. If you do not want to use Kali Linux, then the alternatives are Parrot Security OS, BlackArch Linux and backbox.
- Part 1 – Overview and Network Configuration.
- Part 2 – Installing pfSense Firewall on Virtual Machine.
Table of contents
Download Kali Linux.
Navigate to Kali Linux Pre-built Virtual Machines
Make sure you are in the section named Pre-Built VMs.
Download the Hyper-V 64 bit machine, or Virtual Box or VMware machine based on the virtualization software you are using.
Once you download the pre built VM, you will get a .7z zipped file.

After extracting the .7z file, you will get below files.

Kali VM Creation.
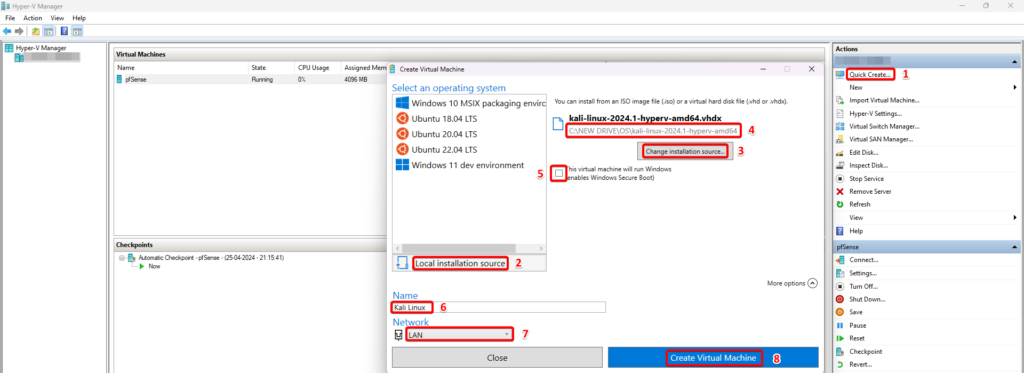
- Step 1: Open Hyper-V Manager and Select Quick Create from the Actions List.
- Step 2: Select Local Installation Source.
- Step 3: Select Change Installation Source.
- Step 4: Open the path where you extracted the pre-built VM and select the .vhdx (Virtual Hard Disk v2).
- Step 5: Uncheck the option Enable Windows Secure Boot.
- Step 6: Change the name of the machine to Kali Linux.
- Step 7: Select the network named LAN.
- Step 8: Select Create Virtual Machine.
- Step 9: Wait for the VM creation process to be completed and select Connect and then Start the VM.
- Step 10: Use the default credentials kali/kali as username/password combination to login in Kali Linux VM.
Install Hyper-V Enhanced Session Mode (Guest Tools).
Hyper-V Enhanced Session Mode enables features like File Sharing, Display Integration. It improves the enhances the interaction between the host (the physical machine running the virtualization software) and the guest operating system (the virtual machine running within Hyper-V)
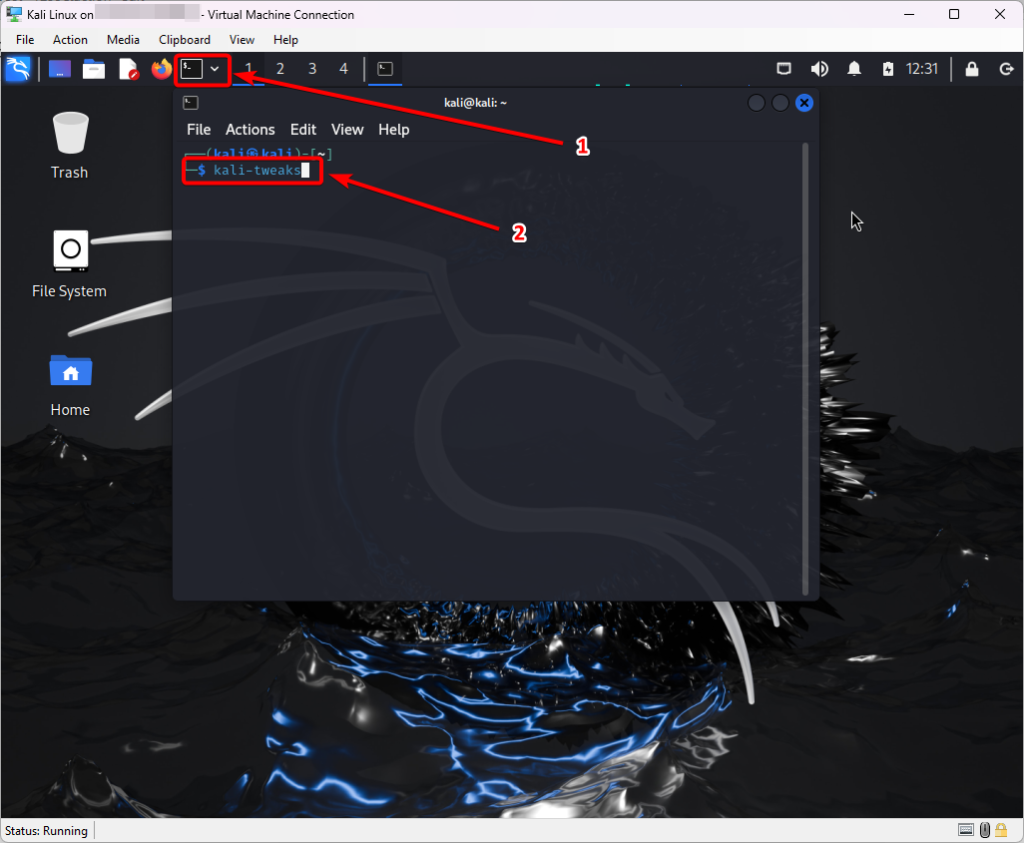
Open the Terminal on Kali Linux and type kali-tweaks
Select the option Virtualization
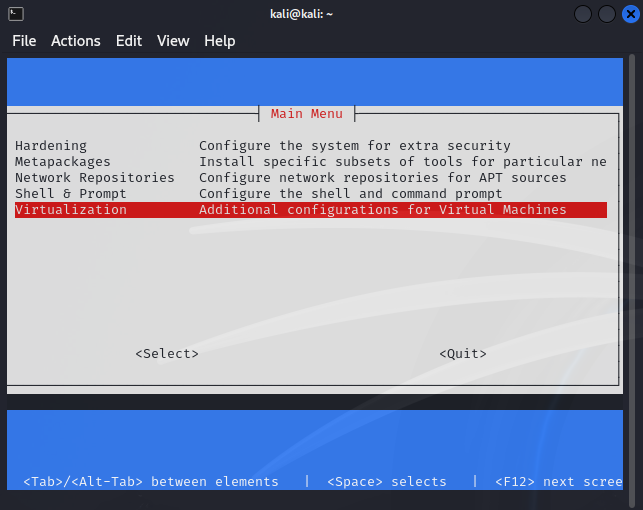
Hit Enter for the option Configure the system for Hyper-V enhanced session mode. And that’s all there is to do on Kali’s side.
Now, please log out of the current Kali Linux’s session.
On the Windows host now: disconnect the Kali VM, open a PowerShell (with Administrator privileges) and issue the following command:
PS C:\Users\ashutosh> Set-VM "KALI VM NAME" -EnhancedSessionTransportType HVSocketRestart both the Host OS and the Guest OS to view the Kali Linux in Enhanced Session Mode.
Check IP Address of Kali Linux.
Login into the Kali Linux in Enhanced Session Mode.
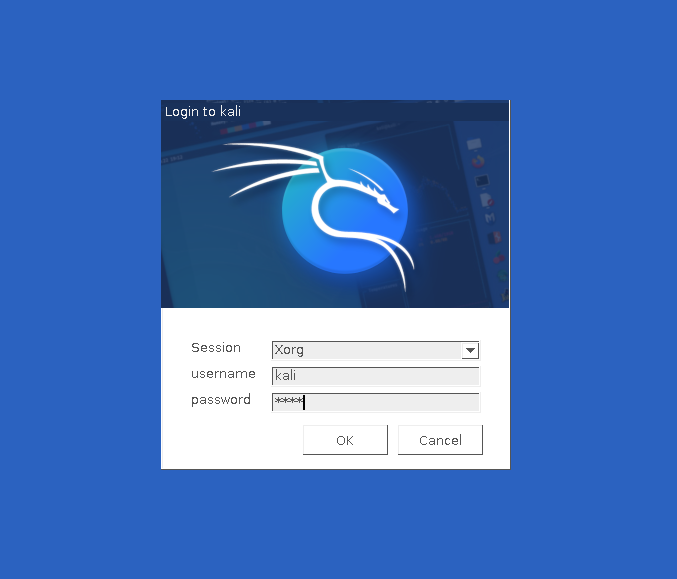
Open the Terminal and type ip address to ensure that the machine is connected to virtual switch named LAN.
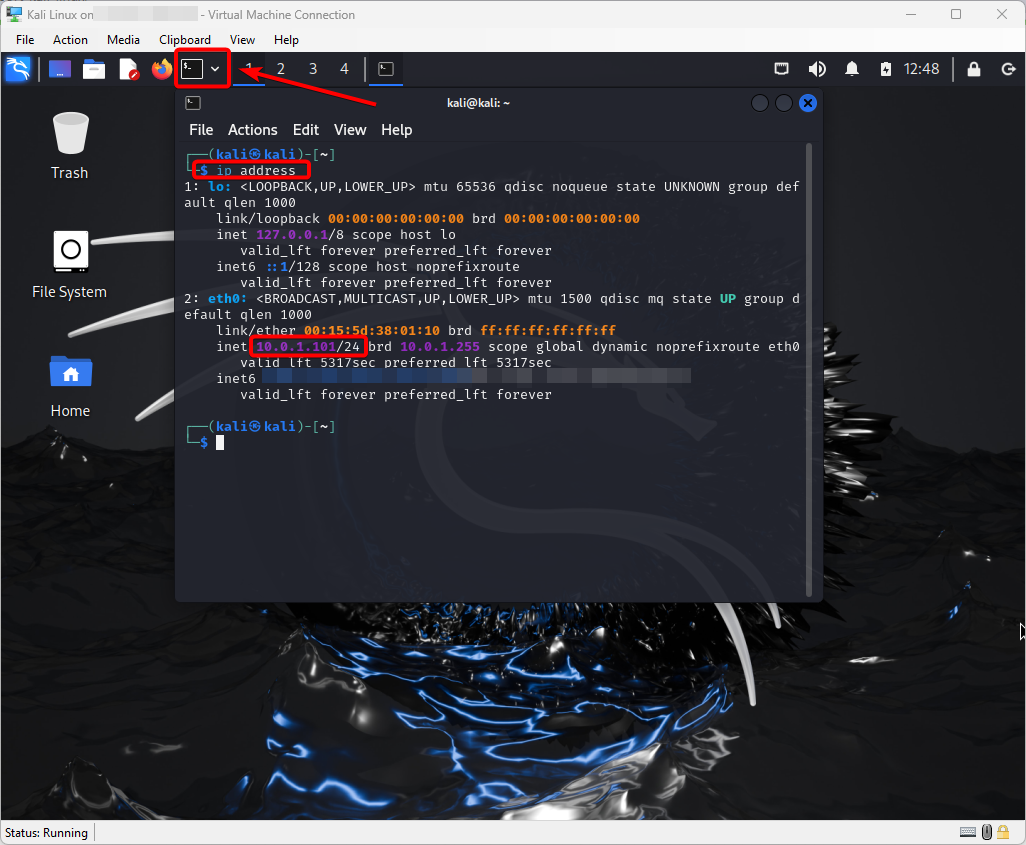
The machine got the IP address 10.0.1.101/24 from DHCP server of pfsense firewall.
We have installed Kali Linux on VM, In the next module, we will configure the pfSense firewall using the Kali Linux Machine.