In this article we will install Active Directory Domain Controller for our AD Lab. We also have to enable and configure few services to make this DC ready for Cybersecurity lab.
- Part 1 – Overview and Network Configuration.
- Part 2 – Installing pfSense Firewall on Virtual Machine.
- Part 3 – Setup Kali Linux on Virtual Machine.
- Part 4 – Configuring the pfSense Firewall.
Table of contents
Install and Configure Windows Server 2019.
Download Windows Server ISO File.
You can either download Windows Server 2022 or Windows Server 2019 to install on a VM.
Download Windows Server 2022 ISO.
Navigate to Microsoft Evaluation Center and select the Windows Server 2022 version
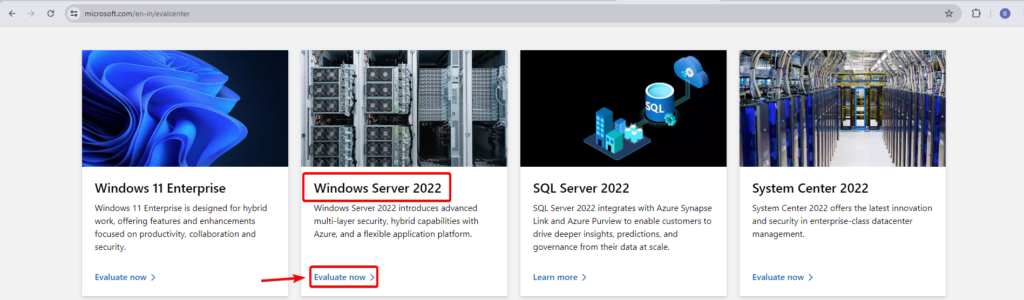
After you click on Evaluate Now, another page will open up, select Download the ISO to download the Windows Server 2022 OS.
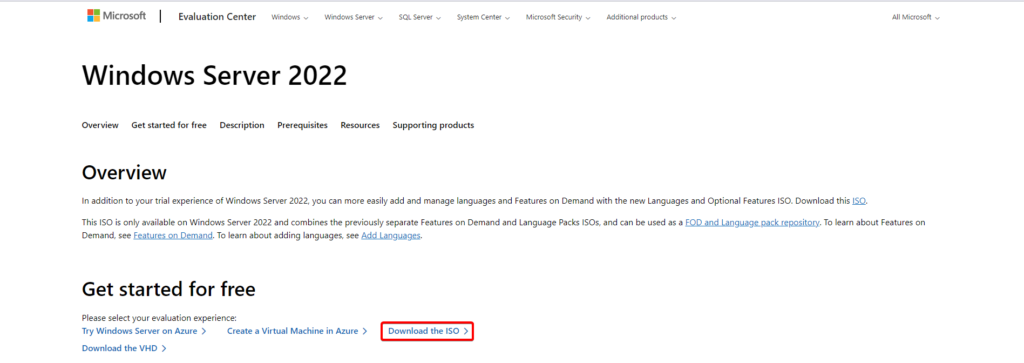
One the next page, Fill out the necessary information and select Download Now.
Download Windows Server 2019 ISO.
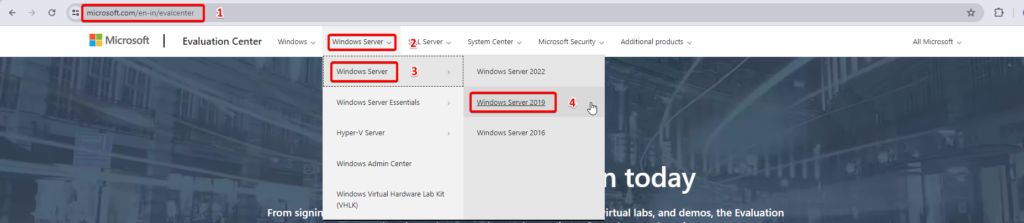
On the next page select Download the ISO, Fill out the necessary information and select Download Now.
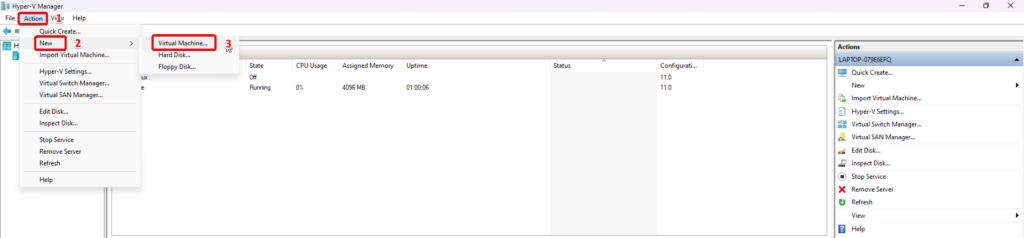
Create VM for Windows Server.
Open the Hyper-V Manager and Click New > Virtual Machine from the Actions list.
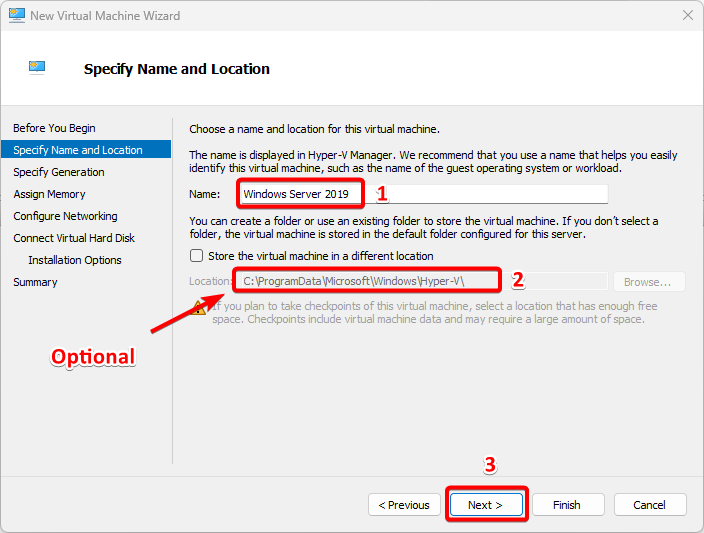
In Specify Name and Location step, Enter a Name for the virtual machine as Windows Server 2019
Select another location on disk to store the VM data (Optional).
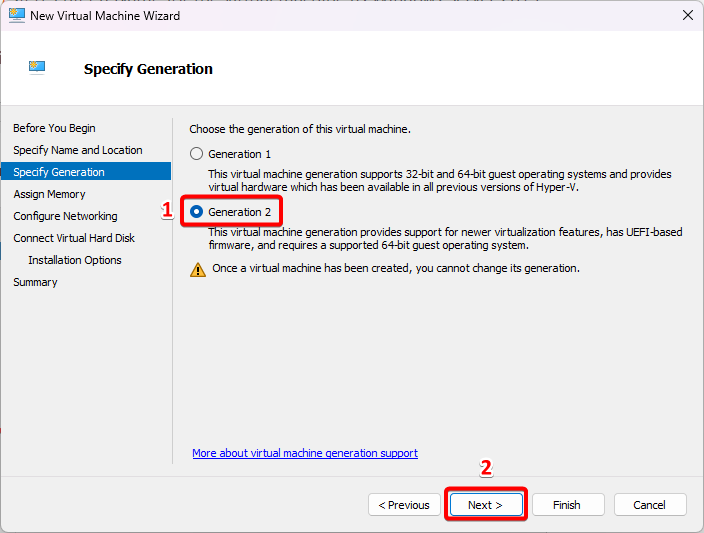
In the Specify Generation step, Select the appropriate virtual machine generation: Generation 2.
In the Assign Memory step, Please add enough RAM to meet the requirements of this environment. 4 GB RAM or more is better. Make sure you select “use dynamic memory for this virtual machine“.

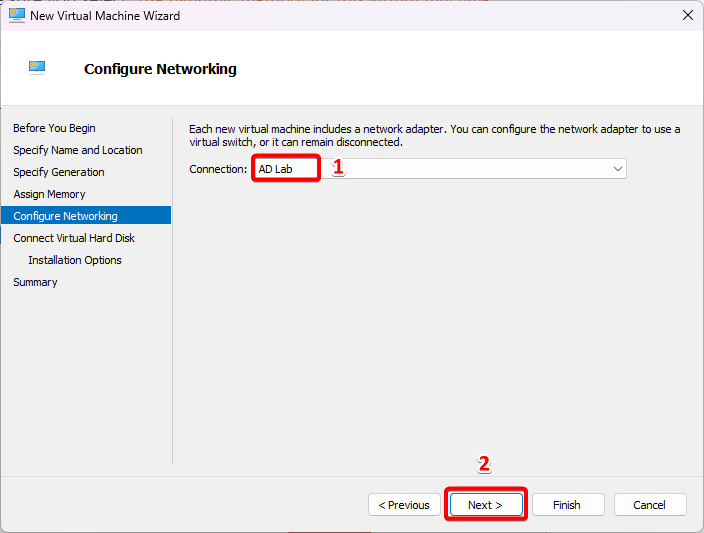
In the Configure Networking step, Select AD Lab from Connection drop-down menu.
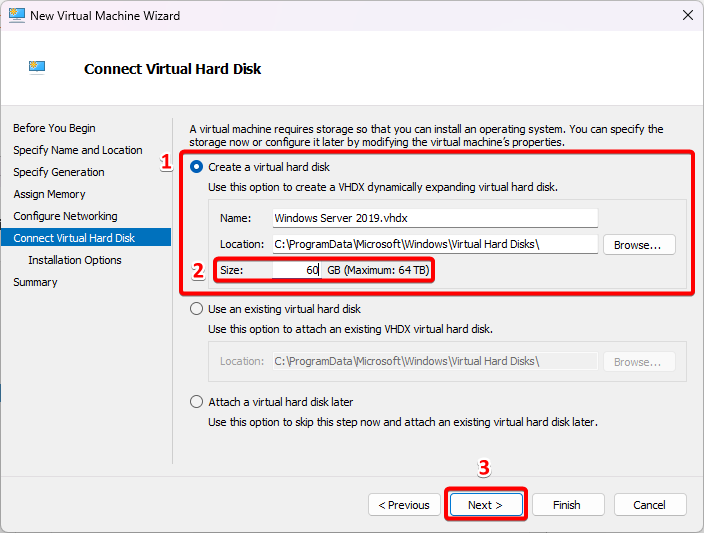
In the Connect Virtual Hard Disk step, Select Create a virtual hard disk and assign 40 to 60 GB for the VM disk.
In the Installation Options step, Select Install an operating system from a bootable image file and Browse to the Windows Server 2019 installer ISO image.

Click Finish if all of the information is correct.
Install Windows Server 2019 OS on VM.
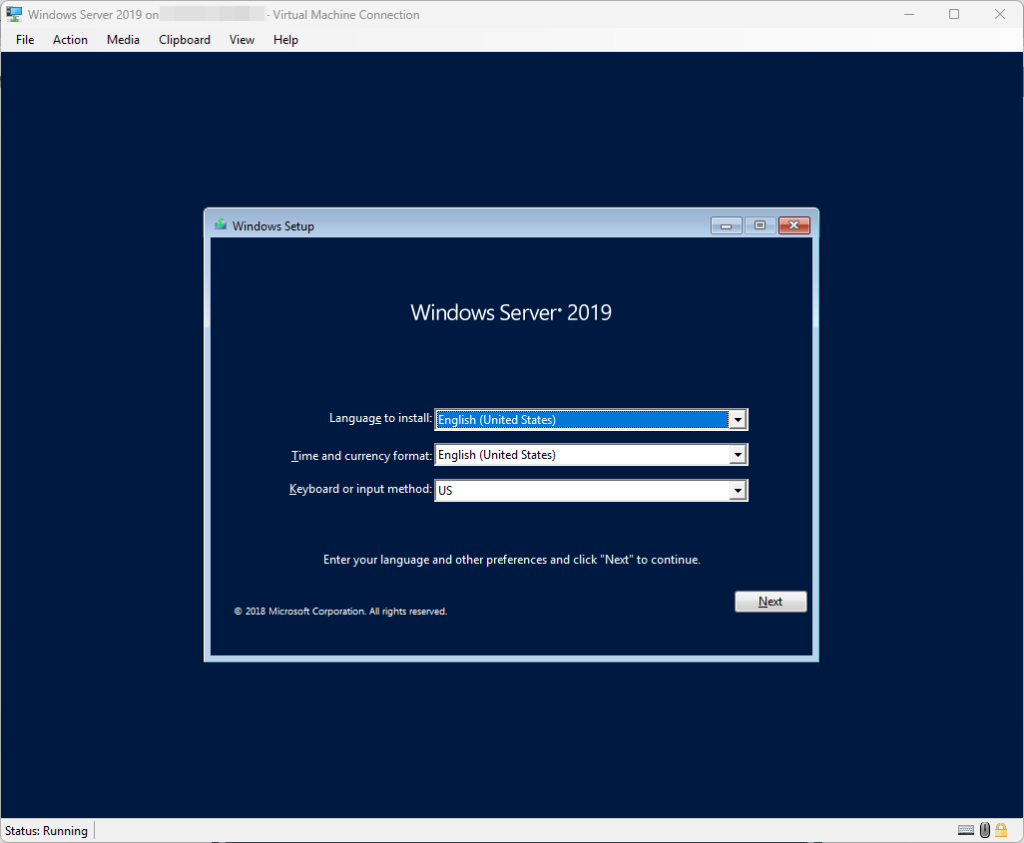
Start the VM.
Select appropriate Language to install, Time and currency format and Keyboard or input method and then hit Next.
Click Install now.
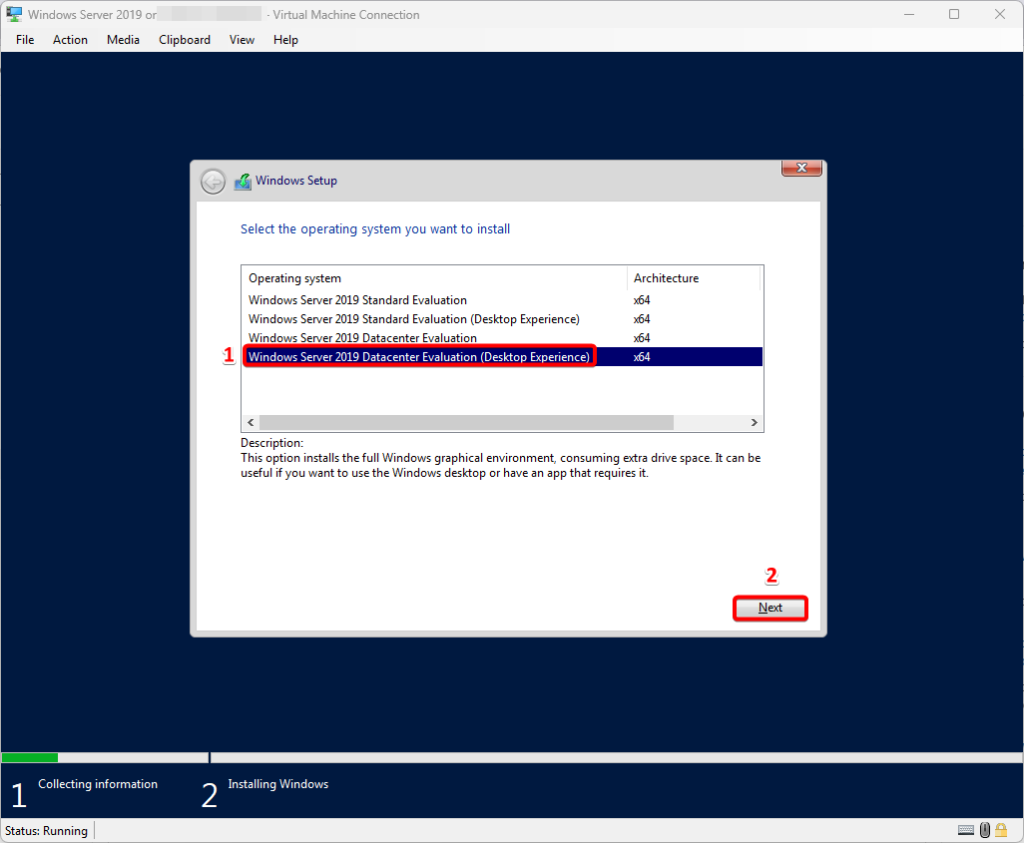
I am selecting the Windows Server 2019 Datacenter Evaluation (Desktop Experience), You have an option to select Windows Server 2019 Standard Evaluation (Desktop Experience)
Refer the article for Comparison of Standard and Datacenter editions of Windows Server 2019
Accept the Applicable Notice and License Terms.
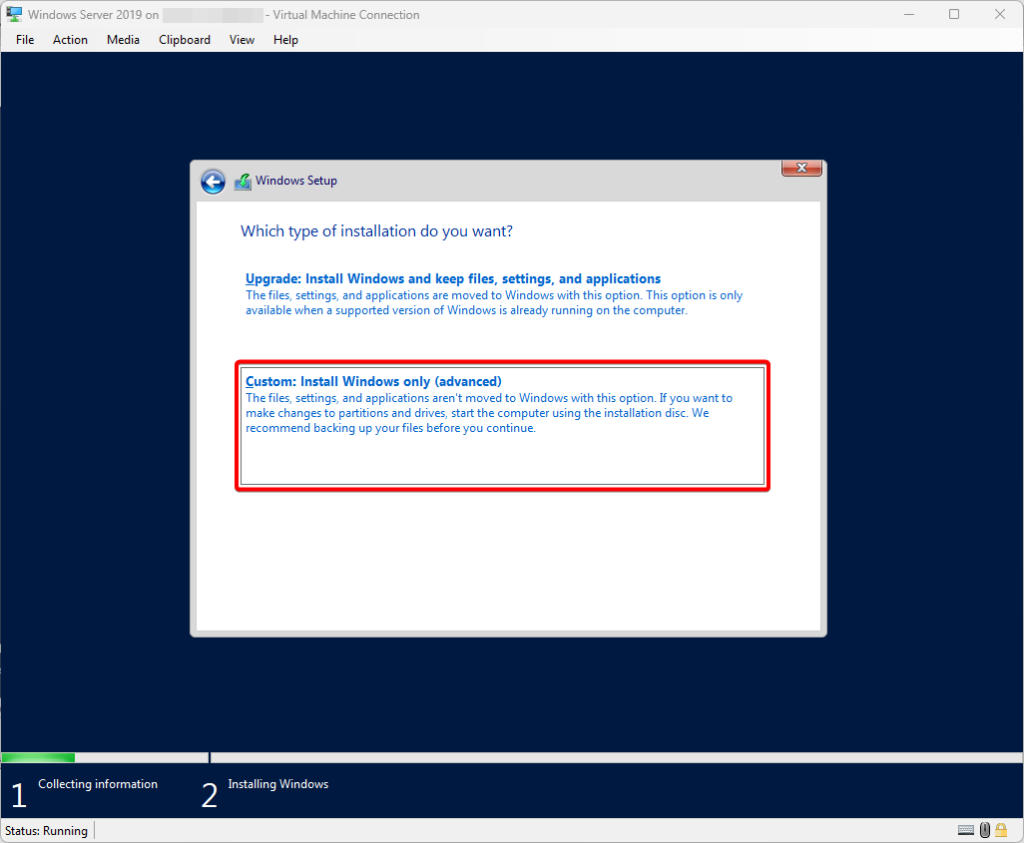
Select Custom: Install Windows only (advanced)
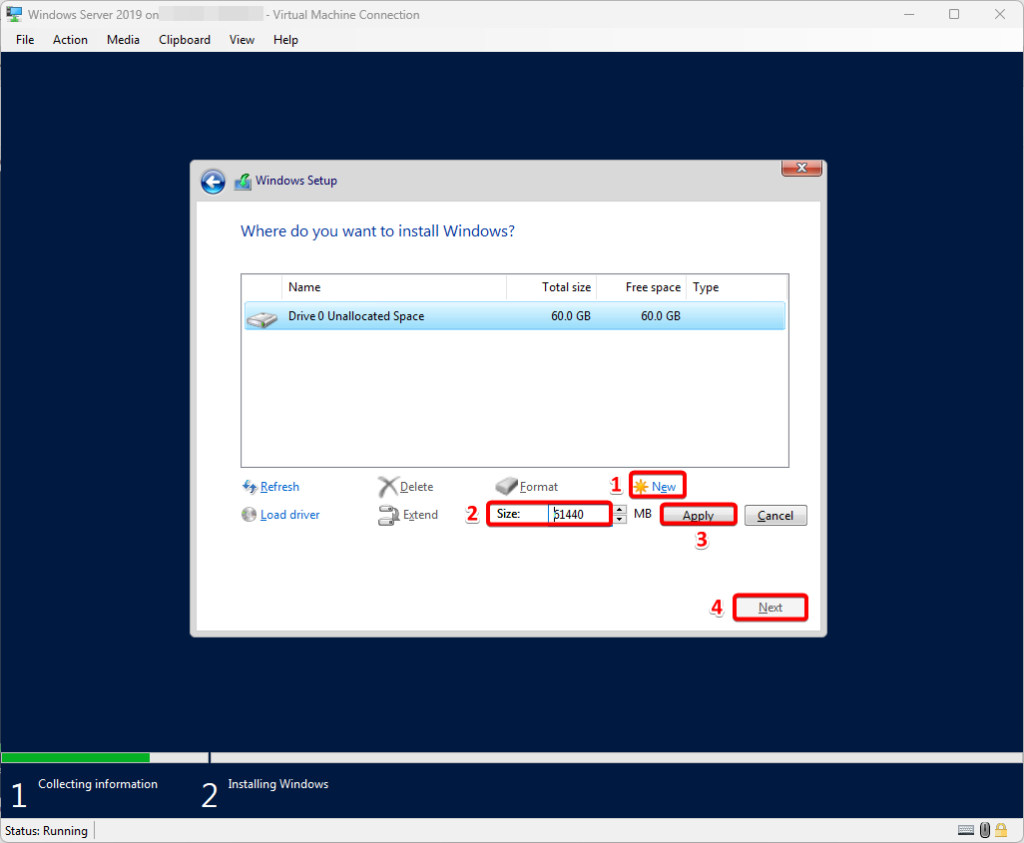
At the time of creating Drive, select new, type the size of the Drive you want to create and then select apply –> ok and hit next.
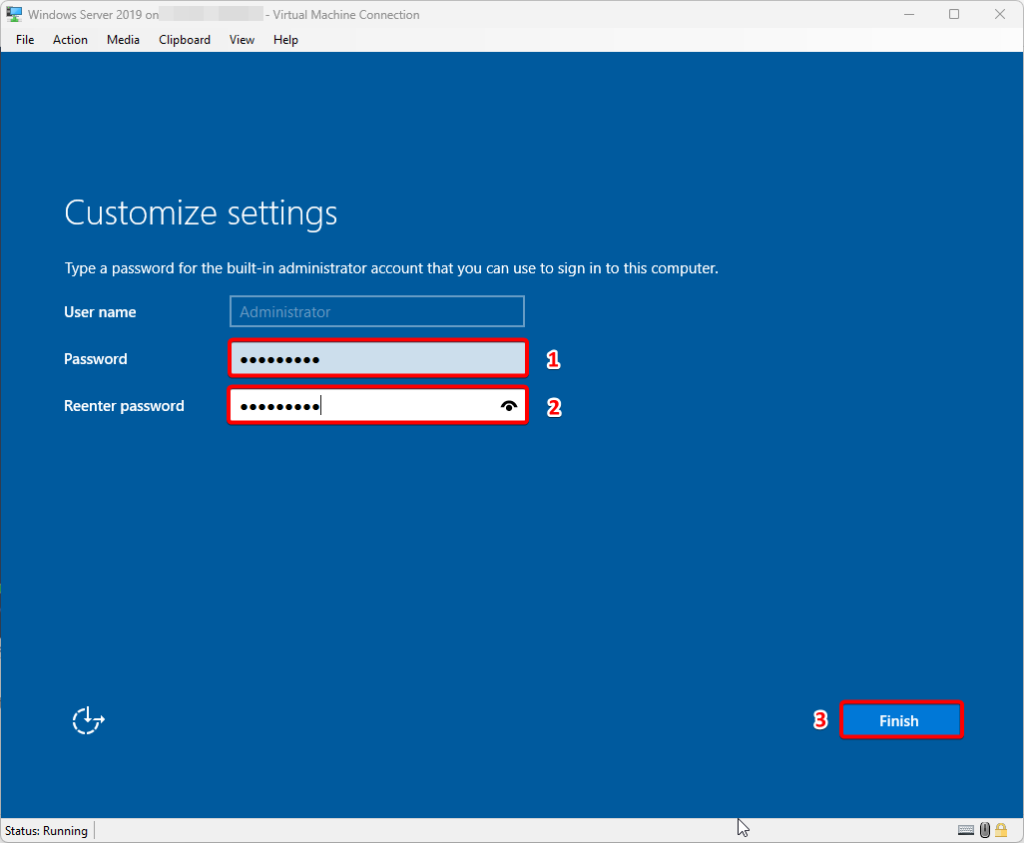
Wait for the installation to complete and set the administrator account password and select Finish.
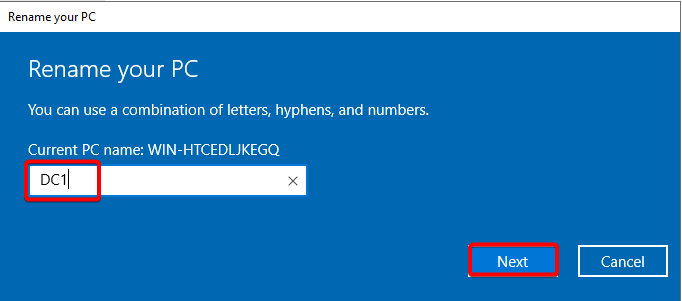
Rename the Server.
Press the start menu –> Settings icon –> System –> About –> Rename this PC
Restart the Machine.
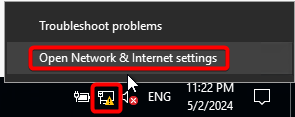
Configure the Network Interface.
As we are not using any DHCP service on the connecting port of pfSense, the Server will not get the IP address automatically, we have to manually set the IP address for the server.
Right click on the network interface icon –> select Open Network and Internet Settings
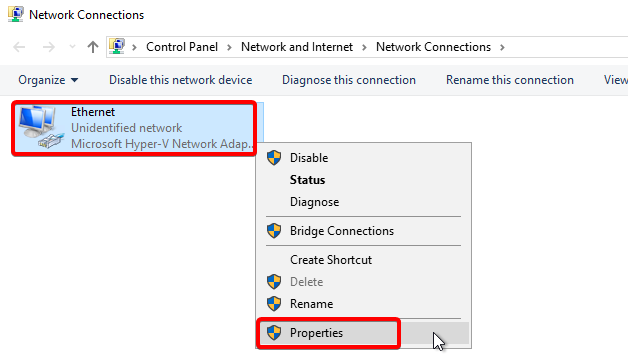
Select Change Adapter Options
Right click on the Ethernet adapter and select properties.
Double click on Internet protocol version 4 (TCP/IP v4)
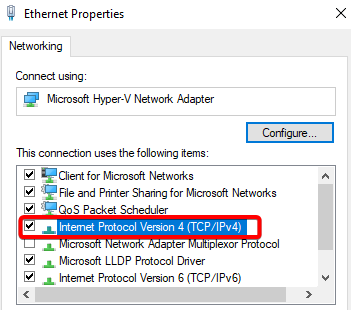
Set the below IP address for the Ethernet adapter.

Configure Active Directory Domain Services.
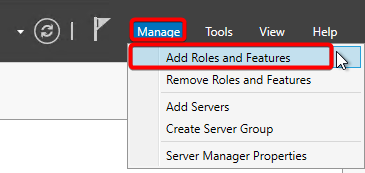
Press the start menu —> Server Manager –> Manage –> add roles and features.
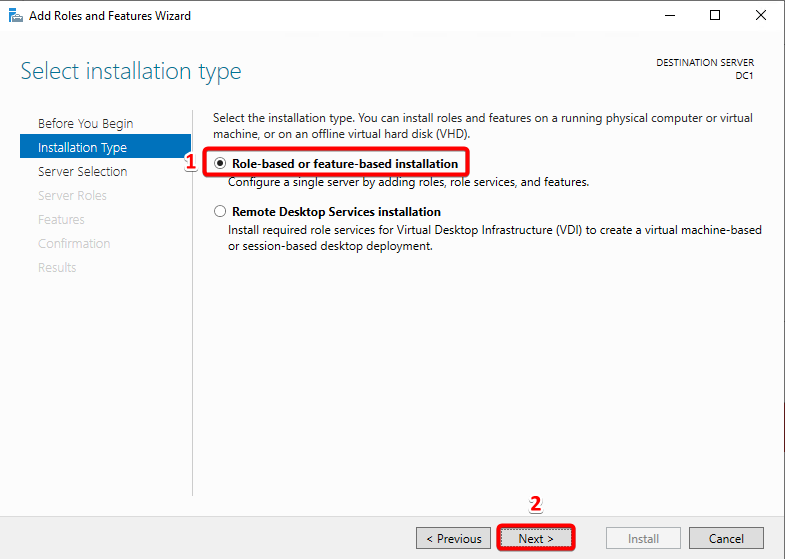
On the select installation type section, select the option Role-based or feature-based installation and hit next.
On the Server Selection section make sure that the option Select a server from the server pool is selected (The server name DC1 is automatically selected) and then hit next.

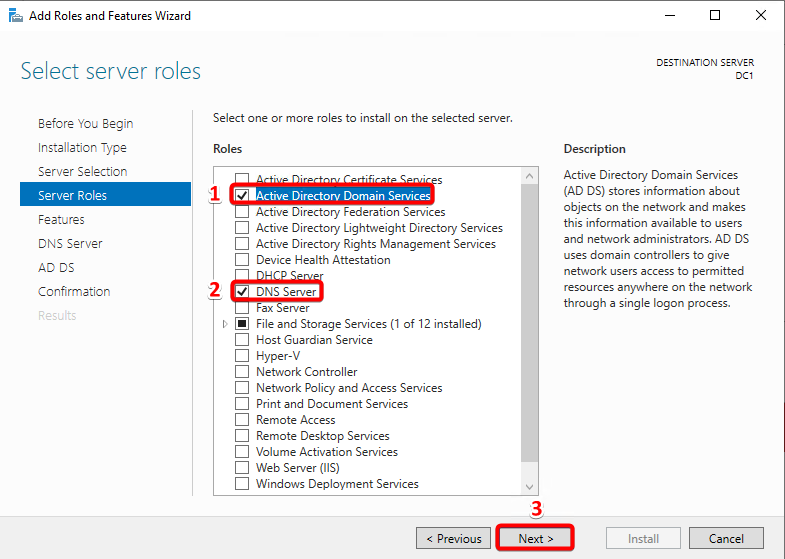
On the Server Roles Section, select Active Directory Domain Services and DNS Server roles and hit next.
Press next till you get the option to install the services and wait for the installation to finish.
Configure Active Directory Services.
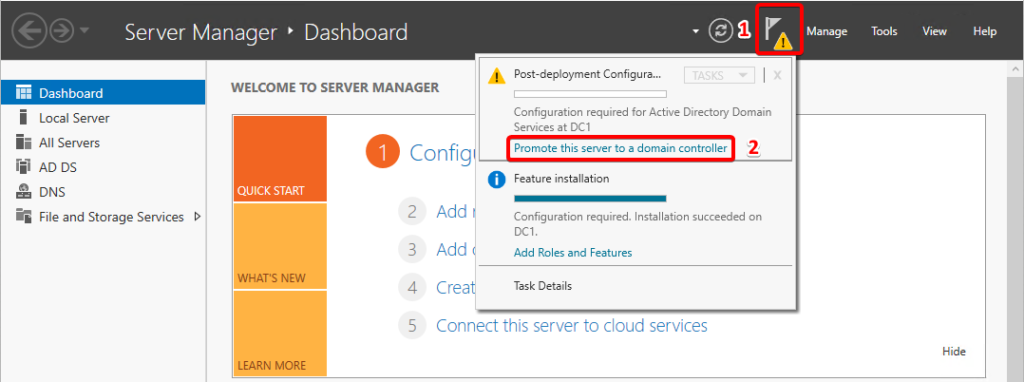
Open the Server Manager and select the flag icon on the top right hand side and select promote this server to a domain controller.
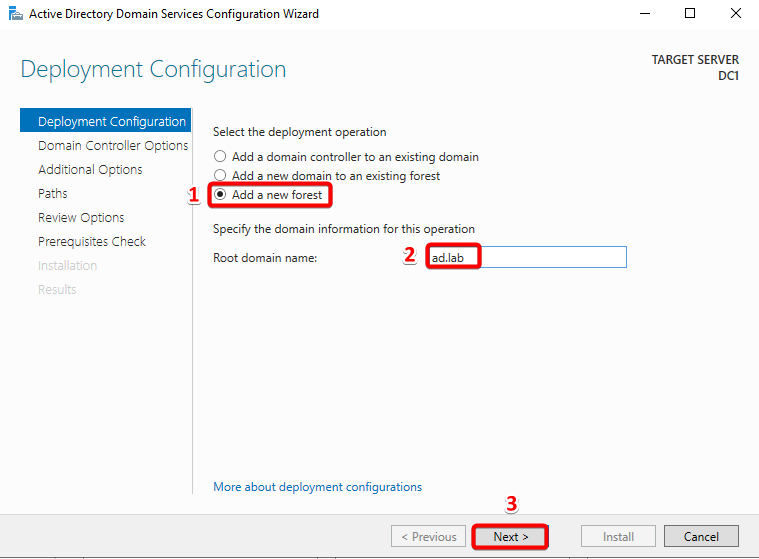
On the Deployment Configuration page, select add a new forest and set the root domain name as ad.lab
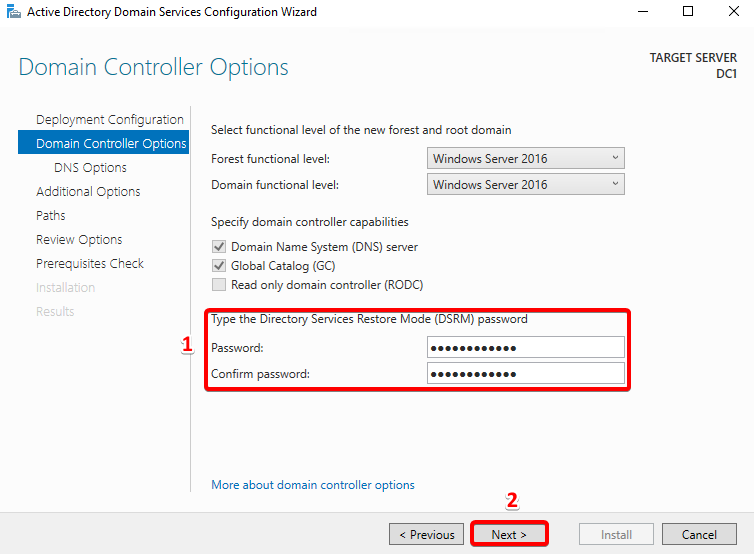
On the Domain Controller Options page, use all the default options and set the Directory Services Restore Mode (DSRM) password.
On the DNS Options page, don’t select anything and press next.
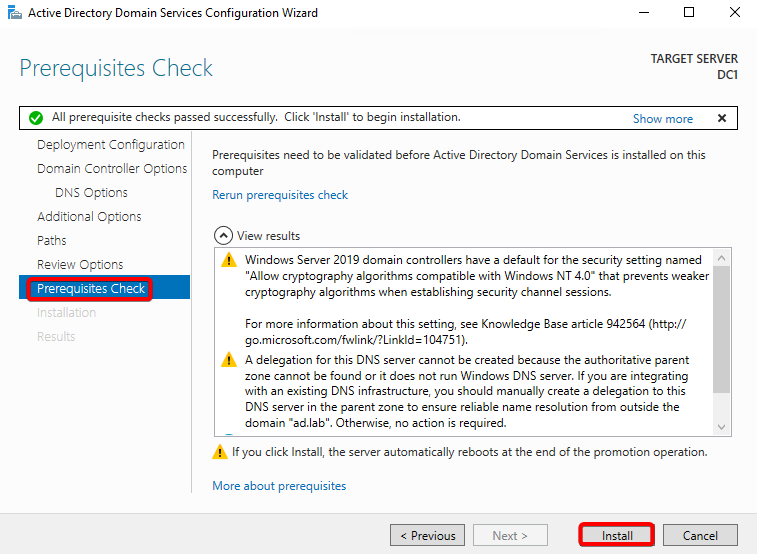
Press next and continue with default settings till the prerequisites check step and then select install.
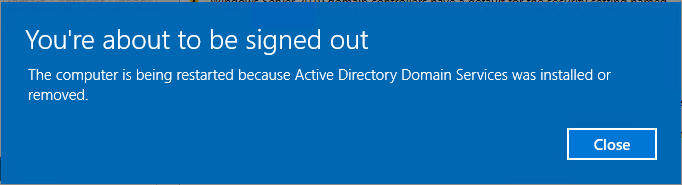
Wait for the installation to complete, you will be signed out and the server will automatically reboot.
DNS Configuration.
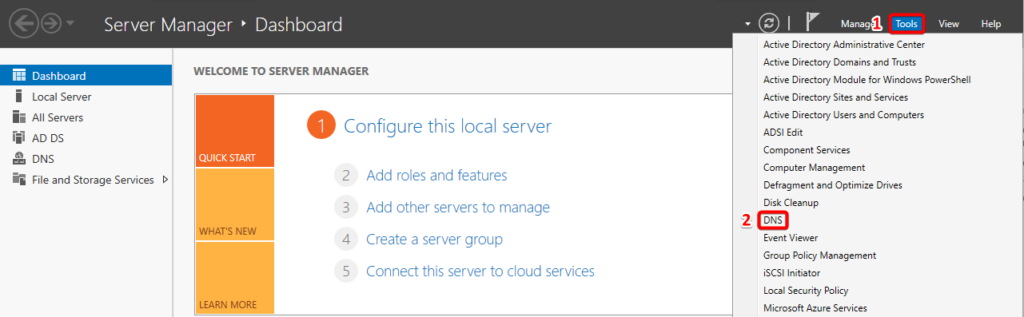
Open the Server Manager –> and select Tools option from dashboard and then select DNS.
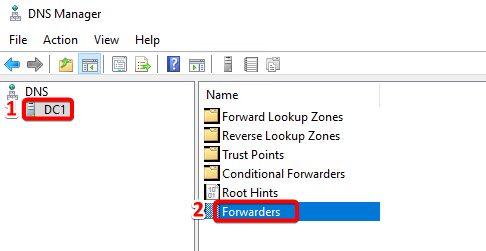
On the DNS Manager section, select DC1 and then double click on Forwarders.
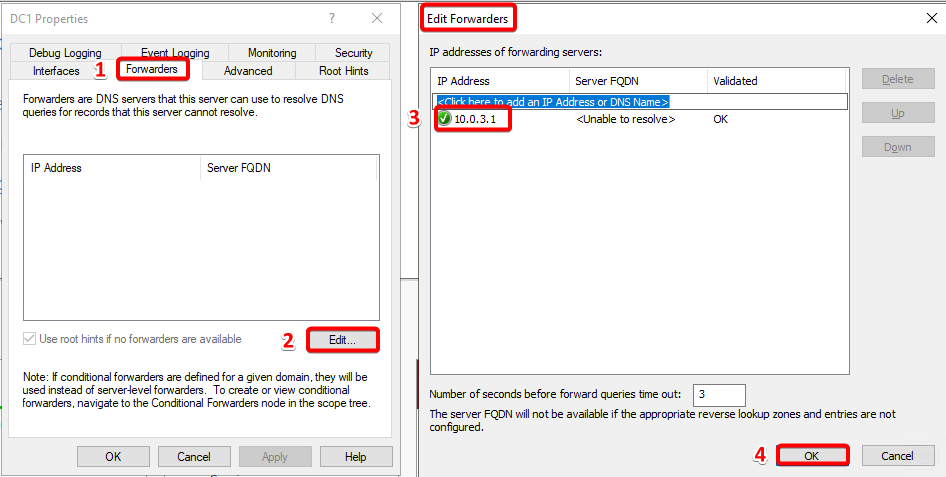
On the forwarders section, click on edit and set the ip address 10.0.3.1 as DNS Forwarder and hit OK.
Active Directory Certificate Services Configuration.
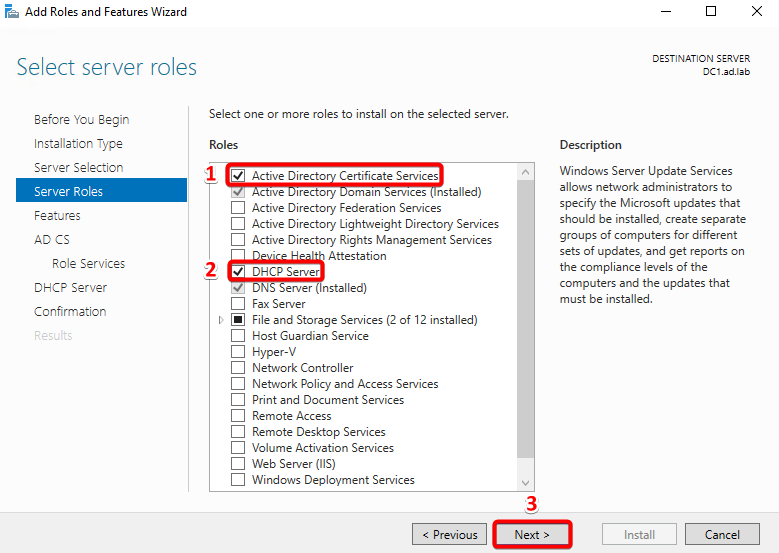
Open the Server Manager and select Manage –> add roles and feature –> hit next till you get to the server role selection step.
On the Select Server Role step select the Active Directory Certificate Services and DHCP Server role and hit next.
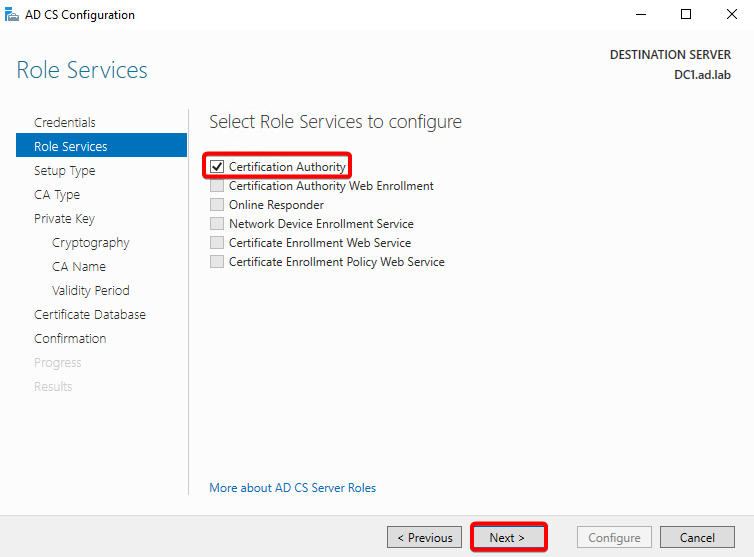
Select the defaults till the setup reaches the AD CS role services and select the Certification Authority role and hit next.

Select the install option and wait for the services to install.
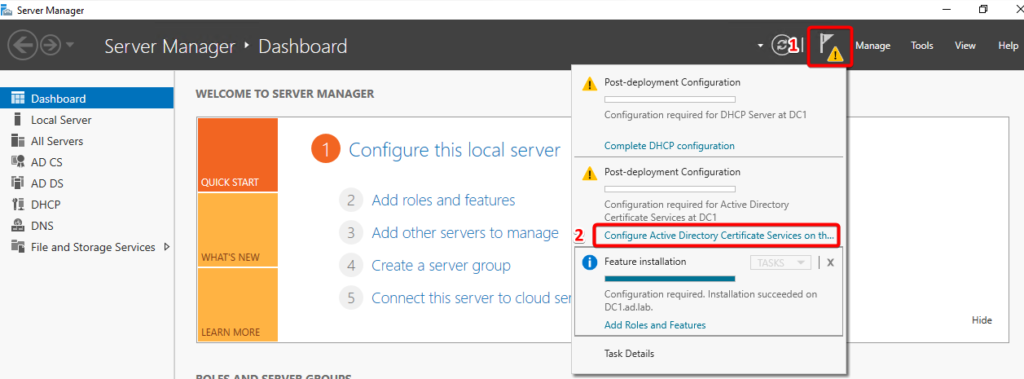
Once the services are installed, open the Server Manager –> select the flag icon on the top right hand side and select configure Active Directory Certificate Services option.
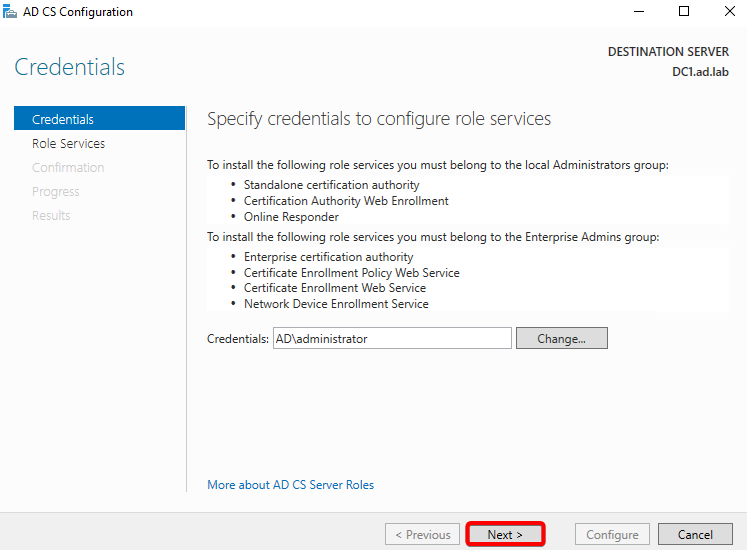
On the credentials selection section, hit next.
In the Role Services section select Certification Authority
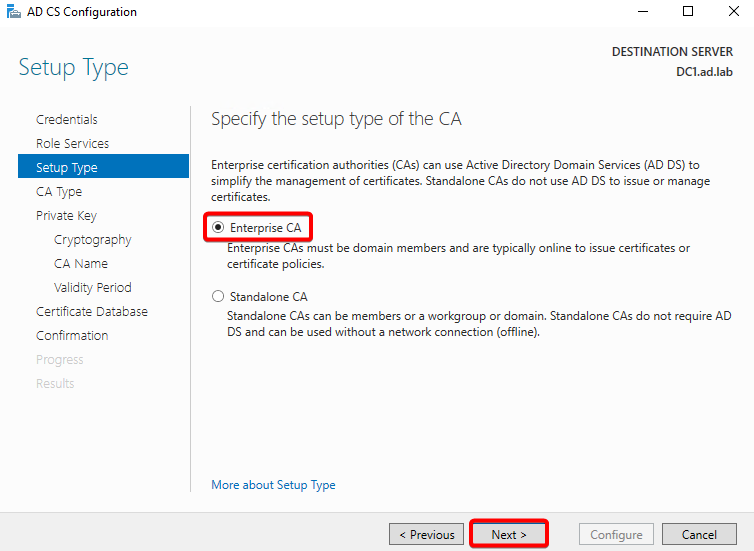
In the Setup Type select Enterprise CA
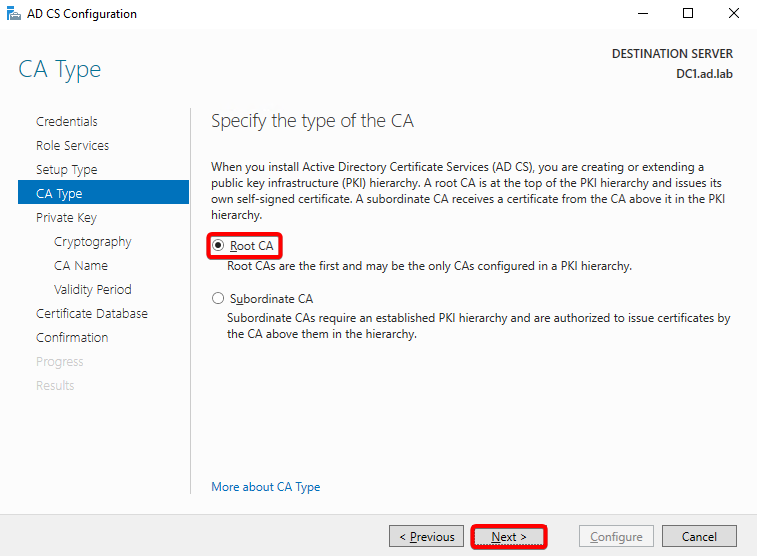
In the CA Type select Root CA
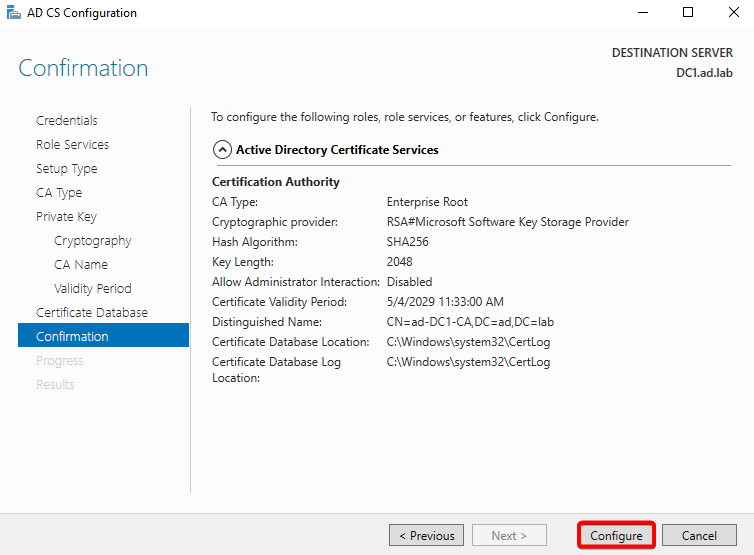
Click on Next till the setup reaches the Confirmation page, Click on Configure to save the changes
Click on Close to exit the configuration of ADCS.
Creating Dummy Users in Active Directory.
Now we will create 2 users for testing in Active Directory.
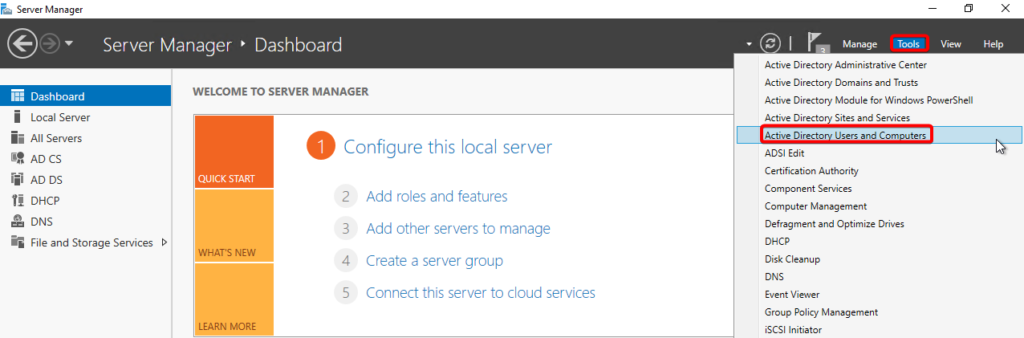
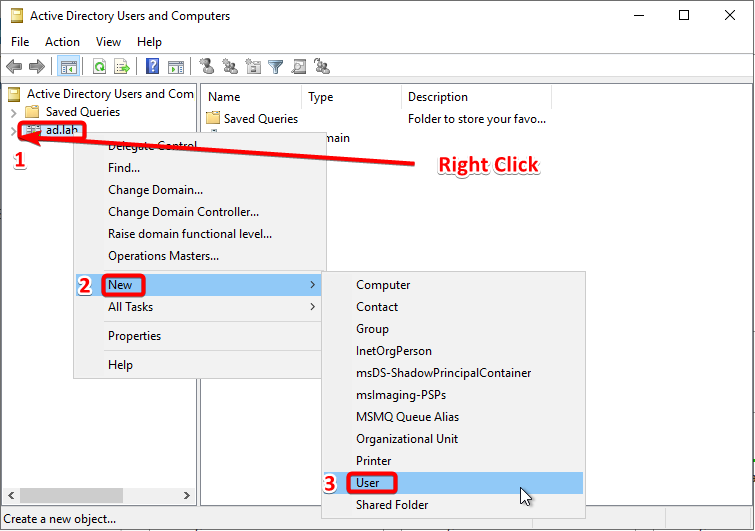
Open Server Manager –> Tools –> Active Directory Users and Computers.
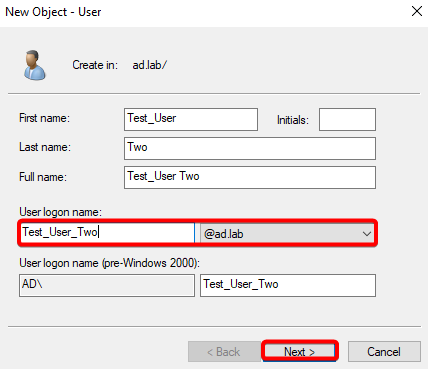
Right click on the domain ad.local and select new and then select user.
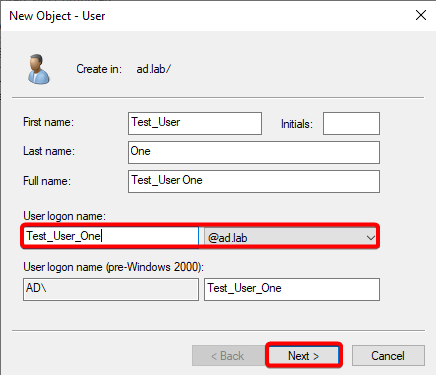
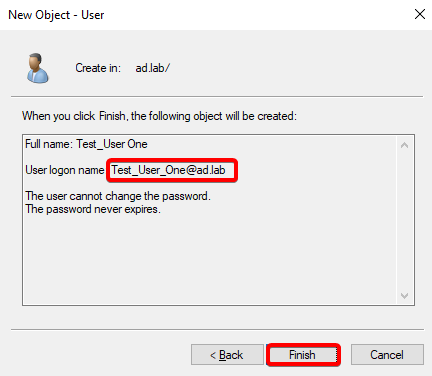
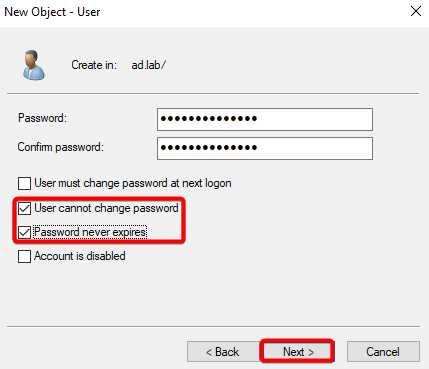
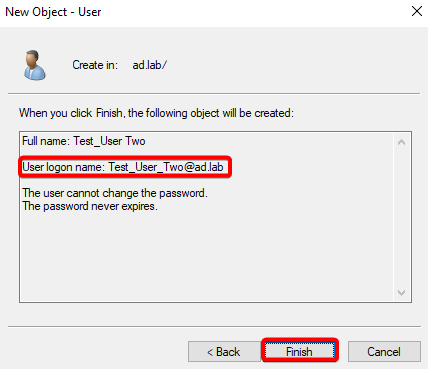
We will create 2 users, User 1 is Test_User_One.
User 2 is Test_User_Two.
In the next article, we will install Windows 10 VM’s and setup DHCP server to assign the ip address to the Windows 10 VM automatically.