In the last article, we have setup and configured Windows Server 2019 in our AD Lab. In this article we will configure DHCP Server and setup Windows 10 VM and add it to the AD Lab network.
- Part 1 – Overview and Network Configuration.
- Part 2 – Installing pfSense Firewall on Virtual Machine.
- Part 3 – Setup Kali Linux on Virtual Machine.
- Part 4 – Configuring the pfSense Firewall.
- Part 5 Active Directory Forest Setup.
Table of contents
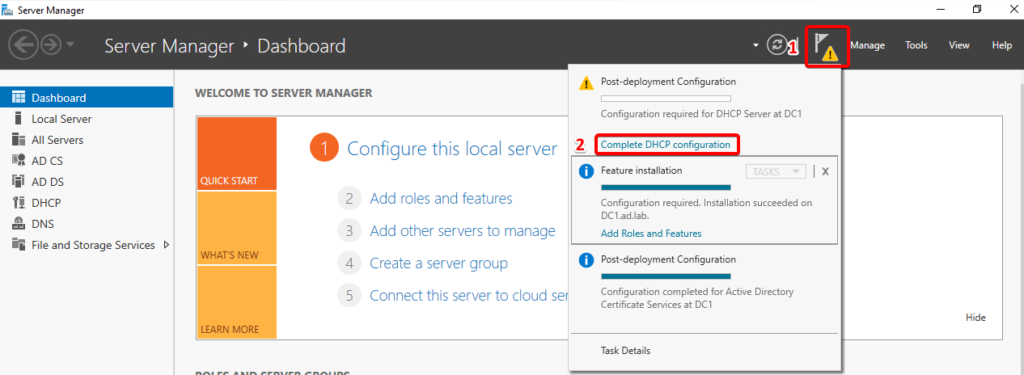
DHCP Post Installation Configuration.
Open Server Manager and select the Flag Icon on the top right hand side and select Complete DHCP Configuration.
In the Authorization section, click on Commit.

Click on the Close button to complete the DHCP post installation configuration.
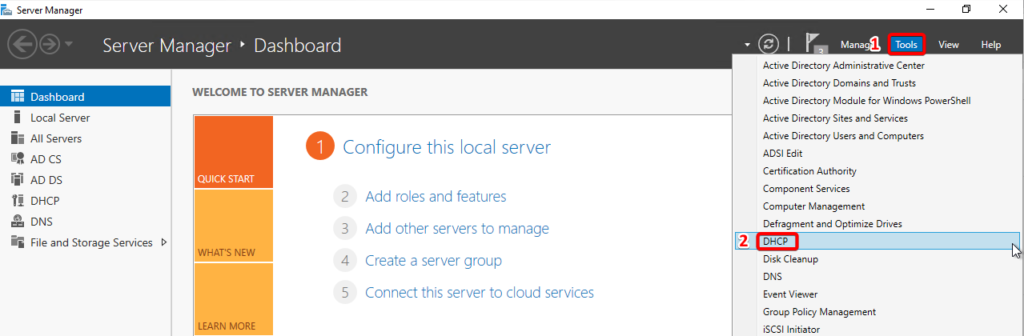
DHCP Configuration.
Open the Server Manager and select Tools and then select DHCP.
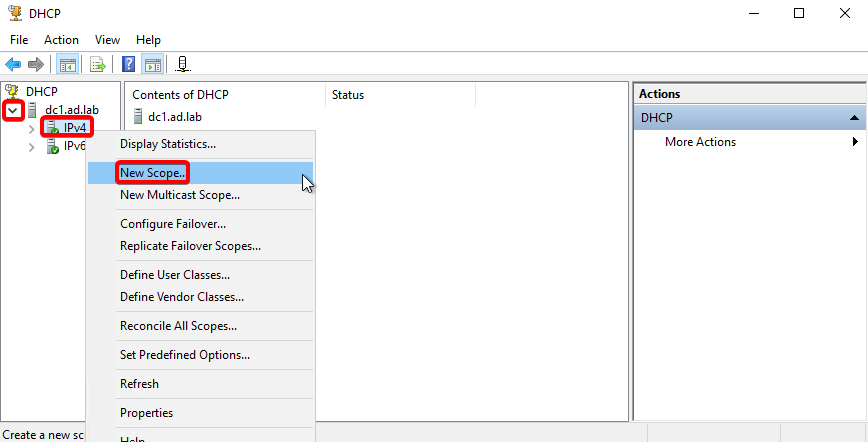
Click on the dropdown for the DHCP Server (DC1.ad.lab) and right click on the ipv4 section and select New Scope.
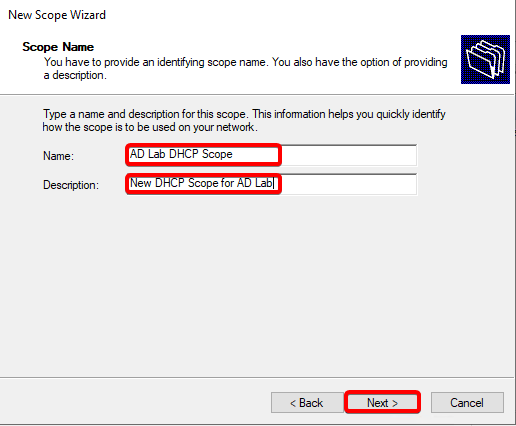
Click next on the DHCP Setup Wizard. Enter the Name and Description of the new DHCP Scope.
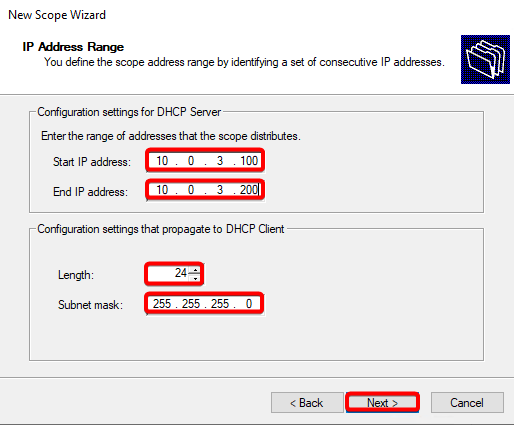
In the IP address range section, provide the start and end ip address for new DHCP scope.
- Start IP address: 10.0.3.100
- End IP address: 10.0.3.200
- Length: 24
- Subnet mask: 255.255.255.0
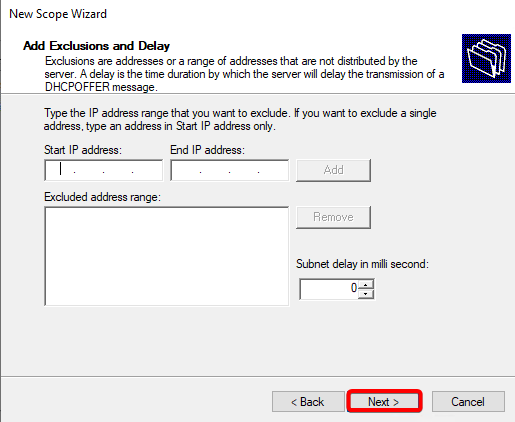
Press next on the add exclusion and delay section as we do not have any ip address to exclude between 10.0.3.100 and 10.0.3.200.
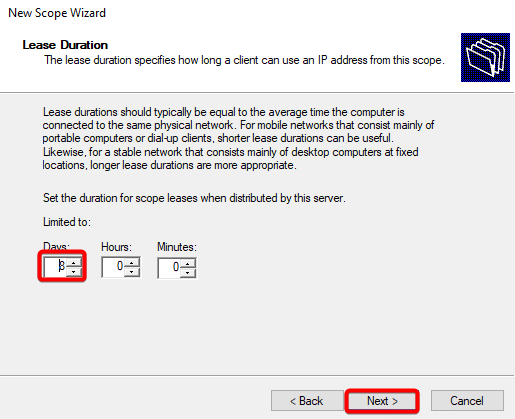
Select the defaults (8 Days) in the lease duration section.
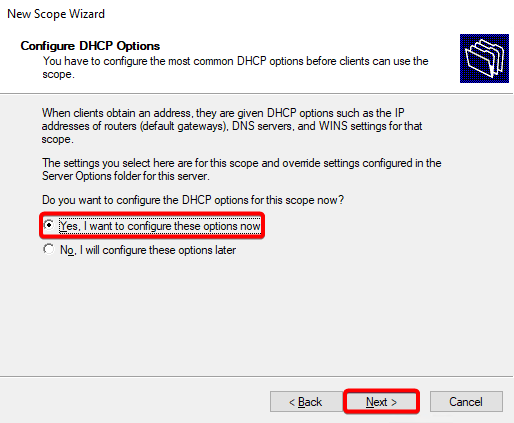
In the Configure DHCP Options section select yes, I want to configure these options now.
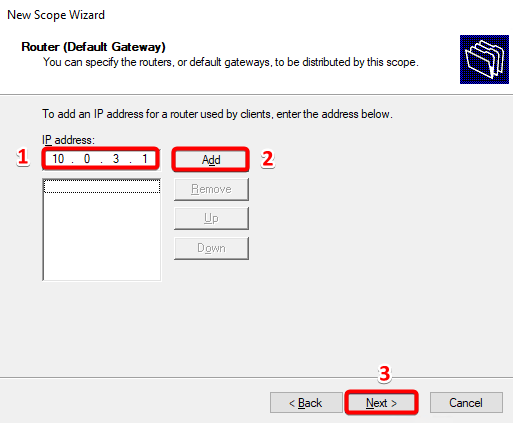
On the Router (Default Gateway) section, use the IP address 10.0.3.1 and press add button.
On the Domain Name and DNS Server section select next.

On the WINS Server section, select next.
On the Activate Scope section, select Yes, I want to activate this scope now.

Click on Finish to complete the Setup.
Windows 10 Virtual Machine.
Now we will start the installation and configuration of Windows 10 VM on Hyper-V.
Download Windows 10 ISO File.
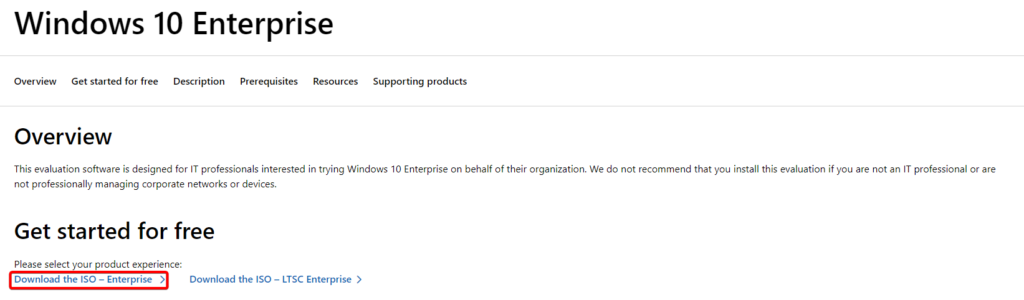
Navigate to the link Microsoft Evaluation Center, select the Windows dropdown and then select Windows 10 Enterprise.

On the next page, select Download the ISO – Enterprise. Fill out the necessary information and select Download Now.
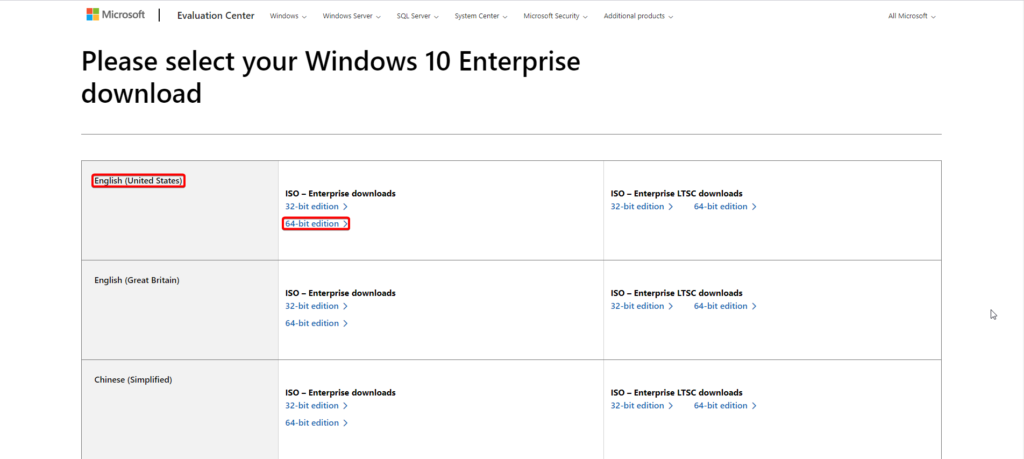
Once you get to the download page, Select 64 bit and Select language of your choice and Download the ISO file.
Create Windows 10 VM.
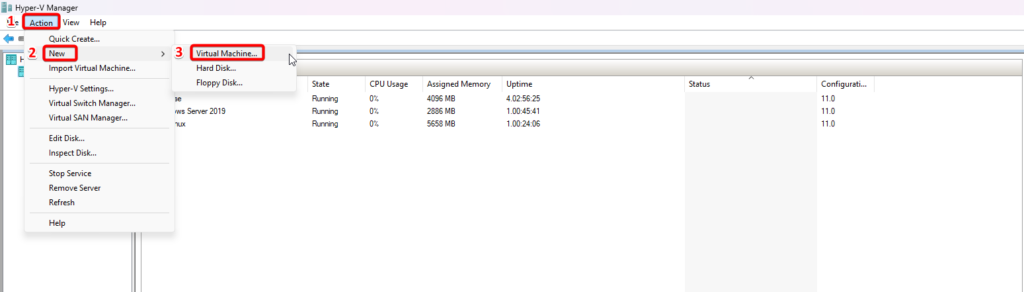
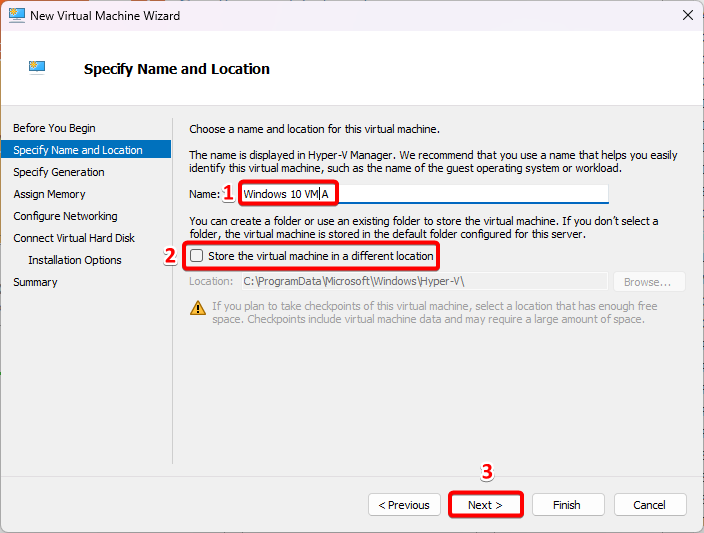
Open the Hyper-V Manager and Click New > Virtual Machine from the Actions list.
In Specify Name and Location step, Enter a Name for the virtual machine as Windows 10 VM A
Select another location on disk to store the VM data (Optional).
In the Specify Generation step, Select the appropriate virtual machine generation: Generation 2.
In the Assign Memory step, Please add enough RAM to meet the requirements of this environment. 4 GB RAM or more is better. Make sure you select “use dynamic memory for this virtual machine“.
In the Configure Networking step, Select AD Lab from Connection drop-down menu.
In the Connect Virtual Hard Disk step, Select Create a virtual hard disk and assign 50 GB for the VM disk.
In the Installation Options step, Select Install an operating system from a bootable image file and Browse to the Windows 10 ISO image.
Click Finish if all of the information is correct.
Install Windows 10 OS on VM.
Open Hyper-V Manager and start the Windows 10 VM A.
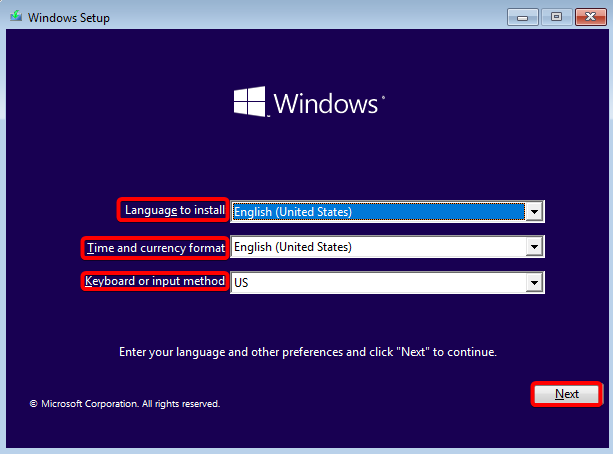
Select appropriate Language to install, Time and currency format and Keyboard or input method and then hit Next.
Click Install now and Accept the Applicable Notice and License Terms.
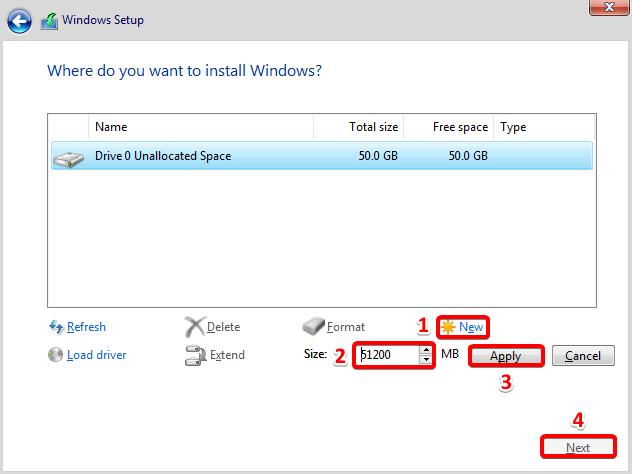
At the time of choosing installation method Select Custom: Install Windows only (advanced).
At the time of creating Drive, select new, type the size of the Drive you want to create and then select apply –> ok and hit next.
Wait for the installation to complete and select the language and keyboard layout of your choice.
Skip the adding of second keyboard layout.
On the next step, select I don’t have internet.
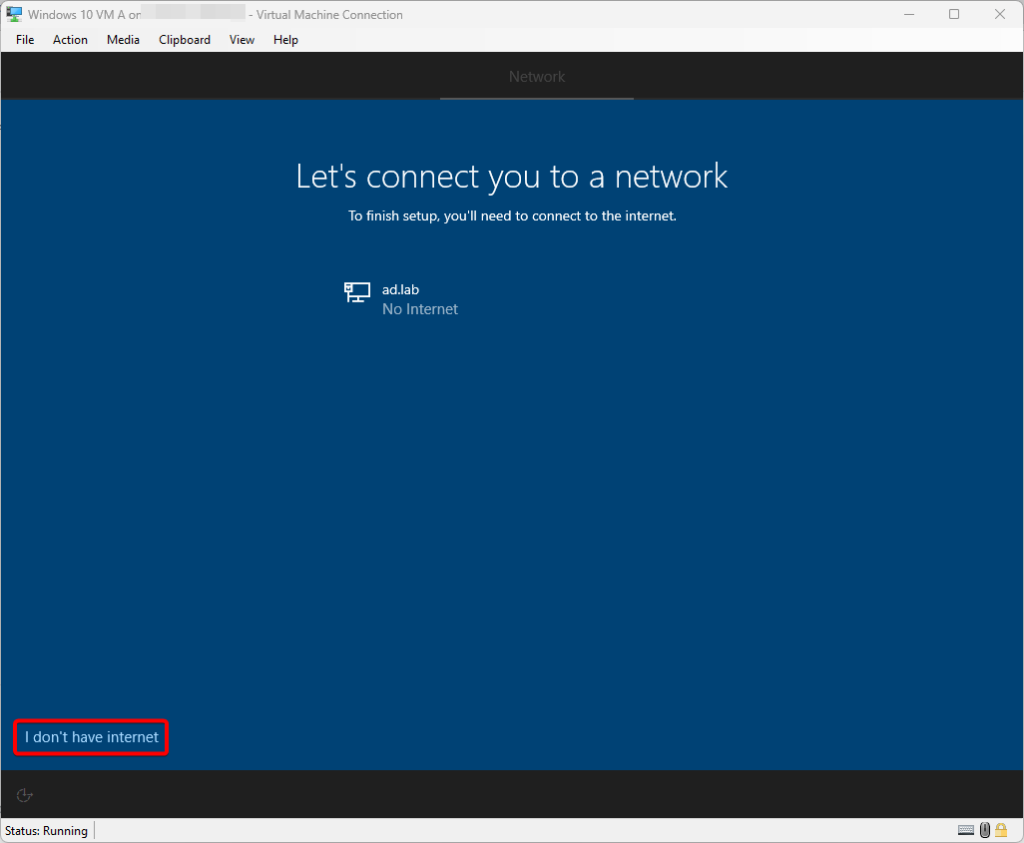
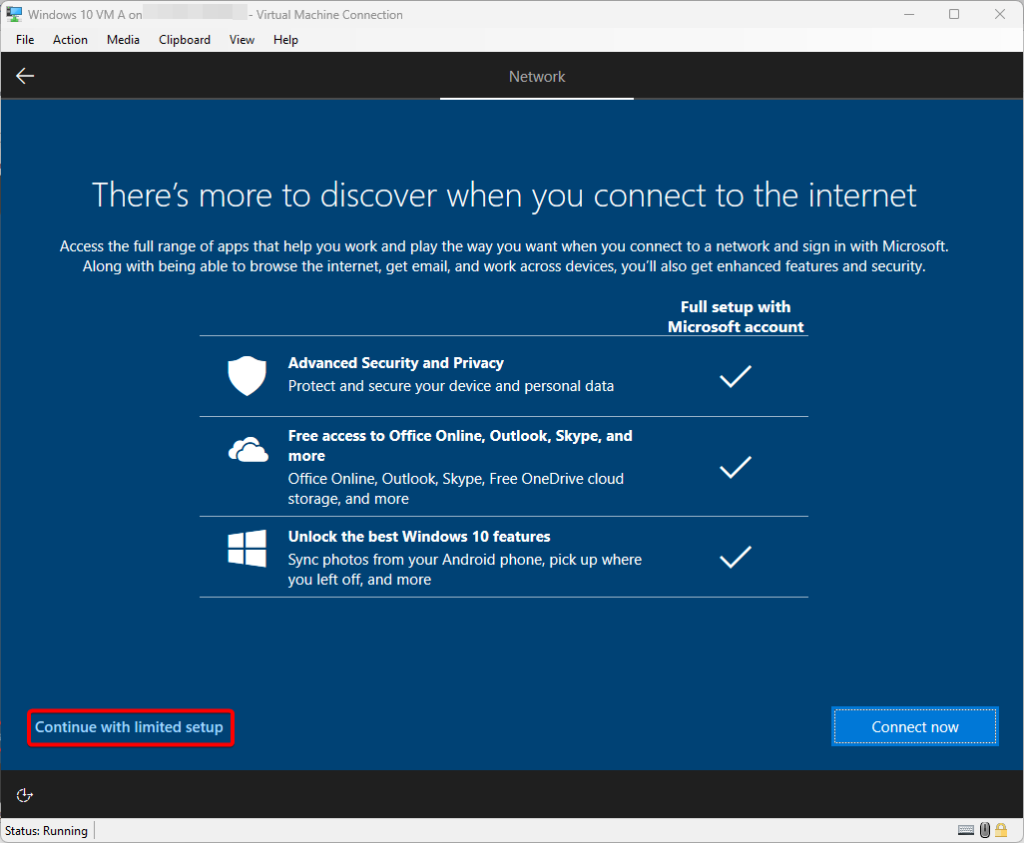
On the connect to internet step, select Continue with limited setup.
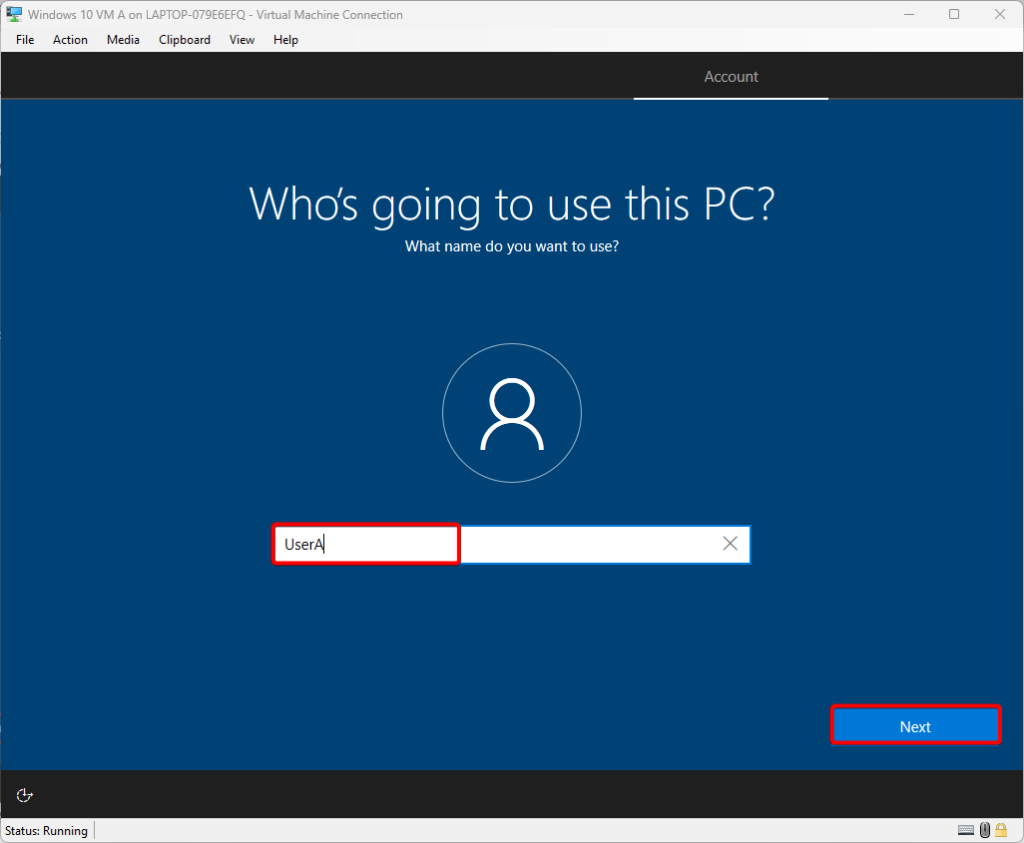
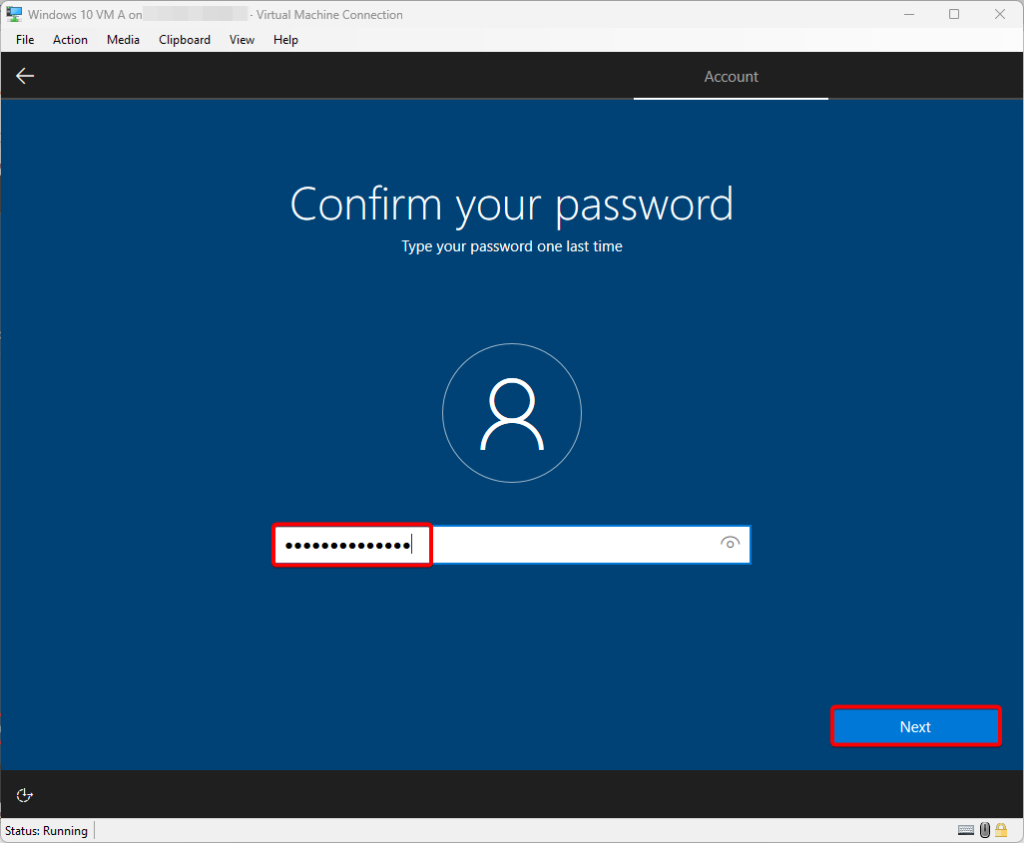
At this point, you can use any username to create a local account to login into the machine.
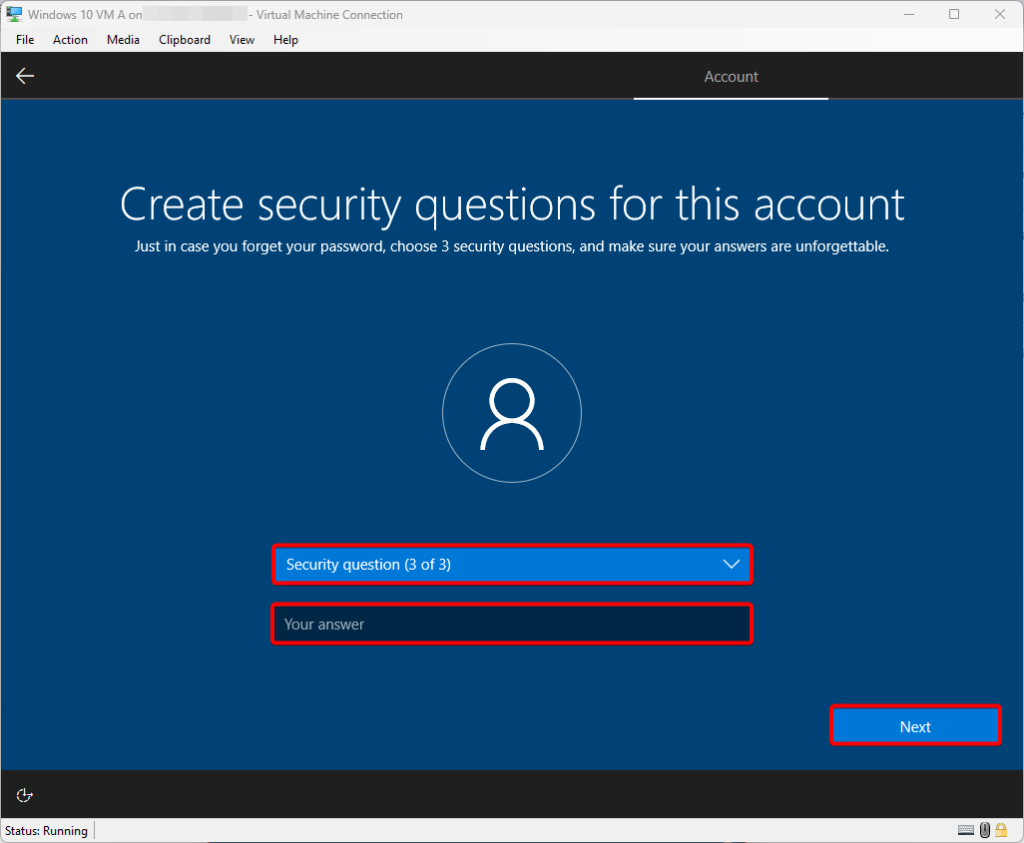
Answer all the 3 security questions and please note down the answers for future use.
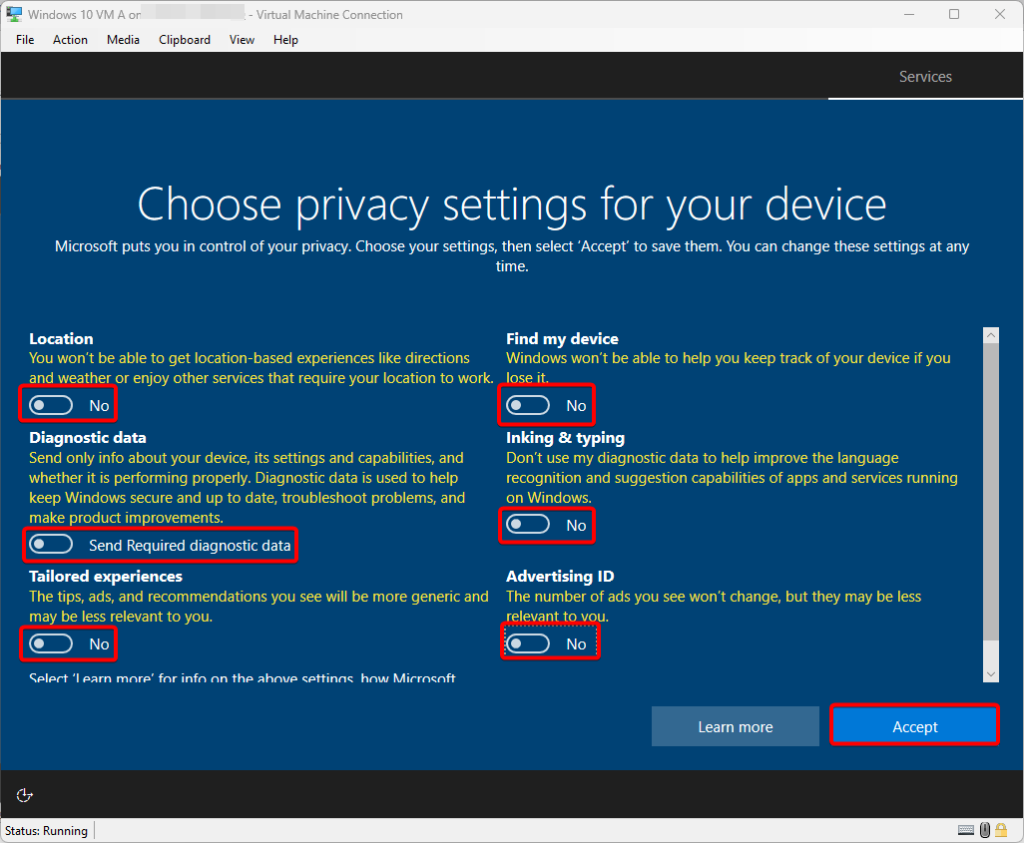
Disable all the options in the privacy settings section and select Accept.
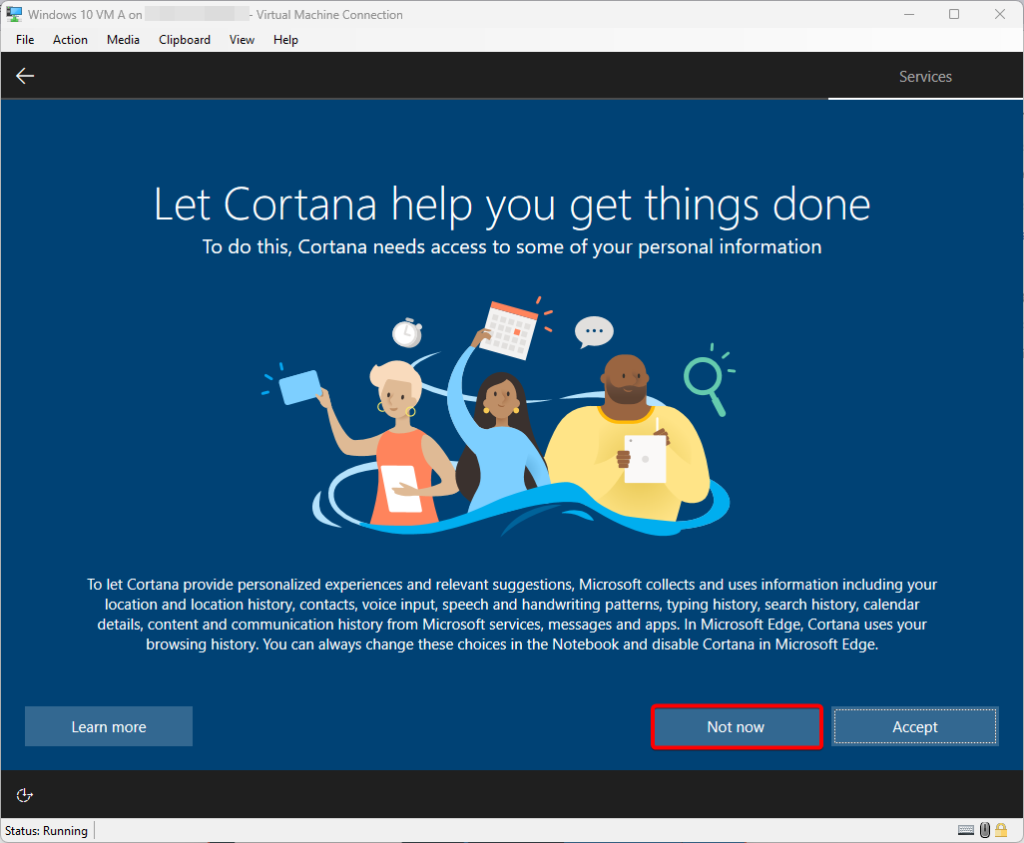
Select Not Now for Cortana.
Wait for the windows to setup.
Connect Windows 10 Machine to Windows Server 2019.
Login into the Window 10 VM using the local account.
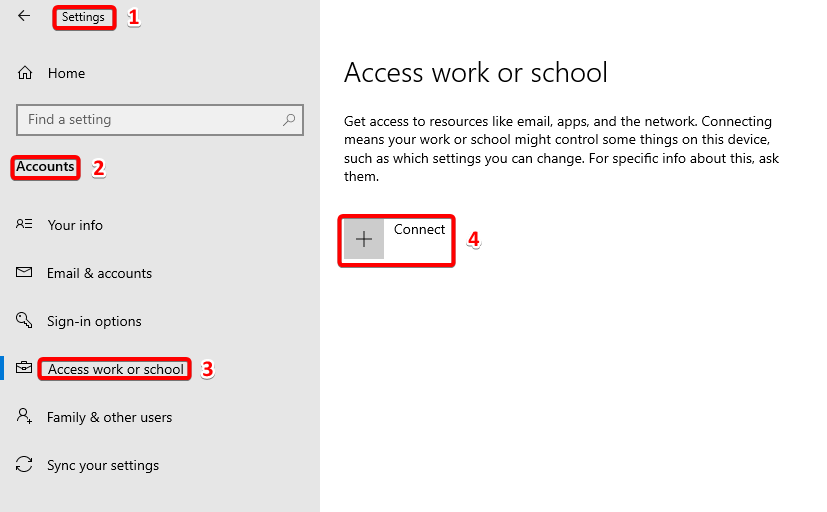
Open Settings –> Accounts –> Access work or school and select Connect
Select the option, Join this device to the local Active Directory Domain.

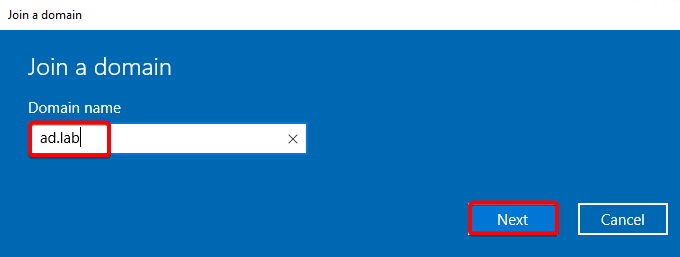
When asked to join a domain, type the domain name as ad.lab and hit next.
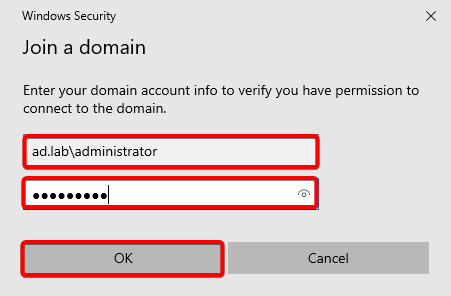
Use the Admin username and password of the Windows Server 2019 for verification.
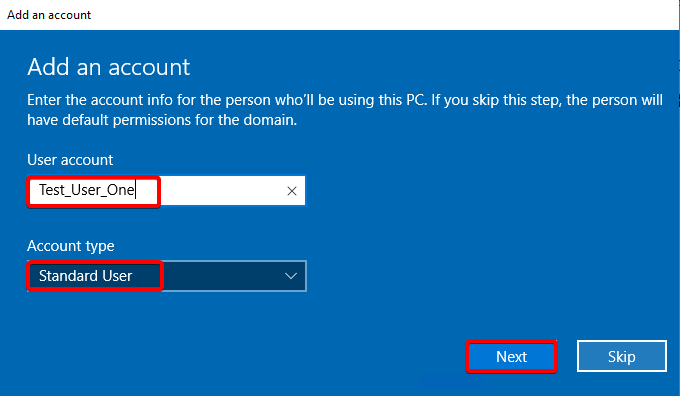
After clicking on OK in the above step, use the details as User Account: Test_User_One and Account Type: Standard User.
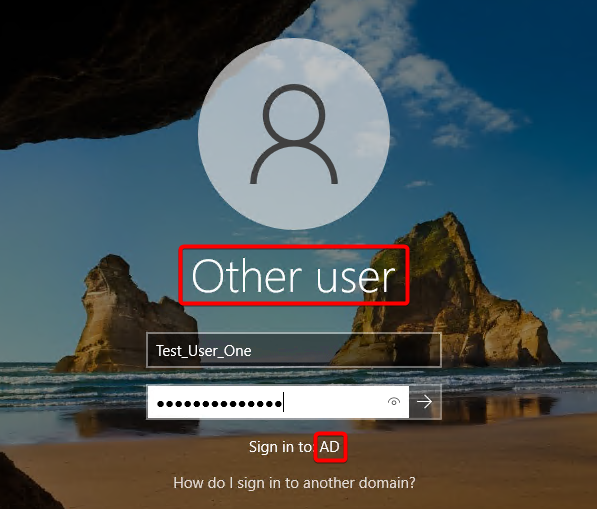
Restart the machine and you will get prompt to login as other user.
Once you login in the machine, open PowerShell and use the command ipconfig /all and whoami.exe to confirm the connection to domain ad.lab

In this module we have installed and joined the Windows 10 machine with the AD LAB network. In the next module, we will install Splunk on ubuntu Linux.